> ## Documentation Index
> Fetch the complete documentation index at: https://docs.tabby.ai/llms.txt
> Use this file to discover all available pages before exploring further.
# Magento 2 Plugin Installation
> Install the Tabby plugin for Magento 2, configure your API keys, and connect to the live environment.
To access the latest features and updates, you can easily update the plugin via Composer.
Tabby works on the Magento 2 platform for all supported countries.
## Installation Steps
Register with Tabby
(KSA: merchant.tabby.sa)
and fill all the business details
)}
/>
Go to Stores -> All Stores page and provide the Store Codes to Tabby account manager. Then receive Test API Keys
)}
/>
 Download Tabby
extension
from the Adobe store:
https://commercemarketplace.adobe.com/tabby-m2-payments.html
Download Tabby
extension
from the Adobe store:
https://commercemarketplace.adobe.com/tabby-m2-payments.html
If due to any reason the Adobe store cannot be used - download the extension from
here
)}
/>
Install the plugin
and
configure Tabby as a payment method
)}
/>
Test your integration
)}
/>
Receive live API keys and
deploy to production
)}
/>
**Important Note**
* Install the extension in your sandbox or staging environment before pushing it live.
* Keep a copy of your Magento store and database to ensure you can revert to the version before the installation.
* If you set up Tabby plugin on your Staging site and copy this configuration to Production site, make sure you go to Tabby plugin settings and click Save to enable all settings and webhooks for on Production site.
* You may need to re-index all the produce and category tables after the extension is installed.
## 2 ways to install/update the Magento 2 Extension
### Using Composer
1. Add Tabby module to composer dependencies
2. Install the defined dependencies
3. Turn on Tabby module in Magento
4. Upgrade Magento database
5. Recompile your project
6. Deploy static view files
Here needed commands are shown:
```
composer require tabby/m2-payments
composer update
php bin/magento module:status
php bin/magento module:enable Tabby_Checkout Tabby_Feed
php bin/magento setup:upgrade
php bin/magento deploy:mode:set developer
php bin/magento deploy:mode:set production
```
#### Additional Commands
During the plugin installation / update the following error might occur: **"Higher matching version 7.0.1 of tabby/m2-payments was found in public repository packagist.org"**:
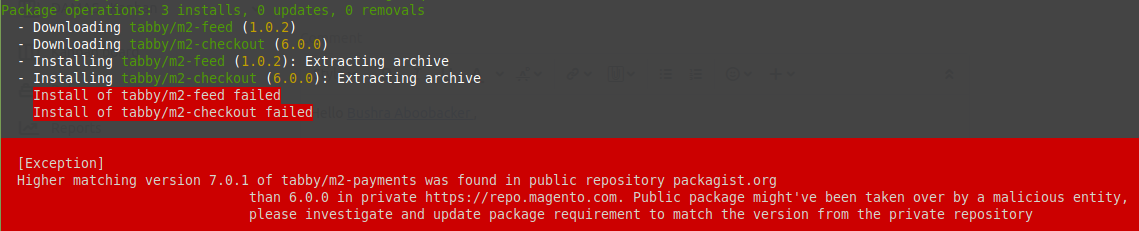 In this case you need to manually set the version for tabby m2-payments to the higher matching version of tabby/m2-payments in public repository packagist.org, e.g.:
```
tabby m2-payments >= 7.0.1
```
### Using Command Line
1. Download the extension from the Adobe store: [https://commercemarketplace.adobe.com/tabby-m2-payments.html](https://commercemarketplace.adobe.com/tabby-m2-payments.html)
In this case you need to manually set the version for tabby m2-payments to the higher matching version of tabby/m2-payments in public repository packagist.org, e.g.:
```
tabby m2-payments >= 7.0.1
```
### Using Command Line
1. Download the extension from the Adobe store: [https://commercemarketplace.adobe.com/tabby-m2-payments.html](https://commercemarketplace.adobe.com/tabby-m2-payments.html)
If due to any reason the Adobe store cannot be used - download the extension from here
2. If it does not exist, create the directory **Magento2\_root/app/code/Tabby/Checkout/**
3. Unzip the extension and move all the files to **Magento2\_root/app/code/Tabby/Checkout/**
4. In the Magento 2 root directory run the following command to verify that **Tabby Checkout** exists in the **List of disabled modules**:
```
php bin/magento module:status
```
5. In the Magento 2 root directory run the following commands:
```
php bin/magento setup:upgrade
php bin/magento deploy:mode:set production
```
6. Clear the Magento 2 cache to use the default Magento 2 Tabby configuration
## Configure Tabby as a Payment Method
After installing the extension, enable Tabby as a payment method by updating Magento 2’s configurations:
1. Sign in to your Magento 2 admin portal
2. Go to ***Stores > Configuration > Sales > Payment Methods > Tabby Payments***
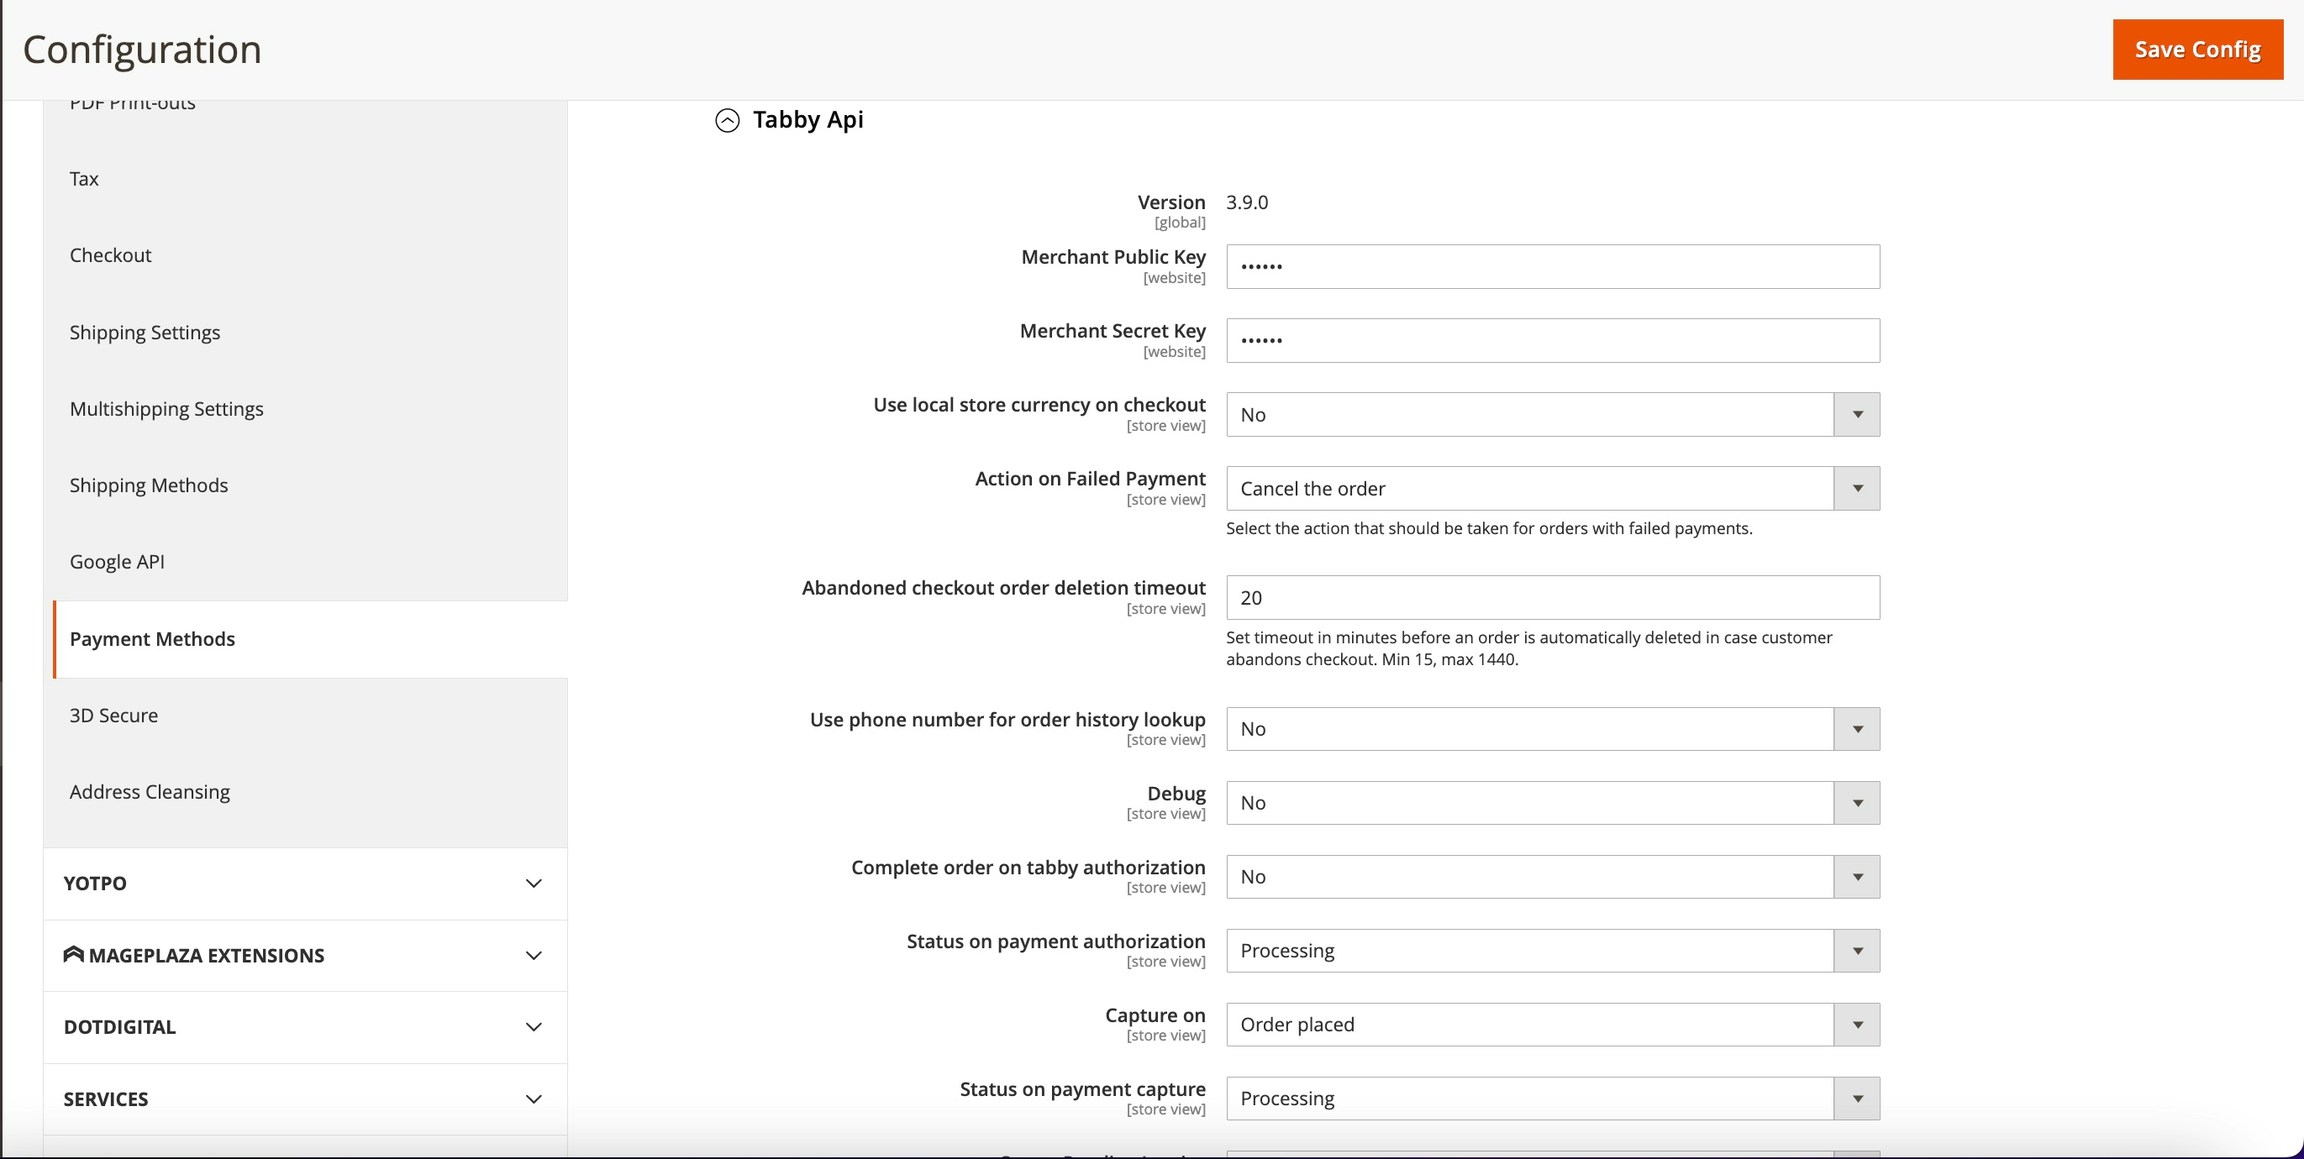
3. Go to **Tabby API** and configure the following settings:
* Enter the **Public API Key** and **Secret API Key** for testing
* Capture On - Order placed (required)
* Enable **Tabby Installments** (Pay later with Tabby) payment methods
An example of Tabby API settings:
 ### Manage Tabby Product Catalogue Feature
Kindly note that Tabby Product Catalogue Feature works with
Live API Keys
only.
1. Sign in to your Magento 2 admin portal
2. Go to ***Stores > Configuration > Sales > Payment Methods > Tabby Payments***
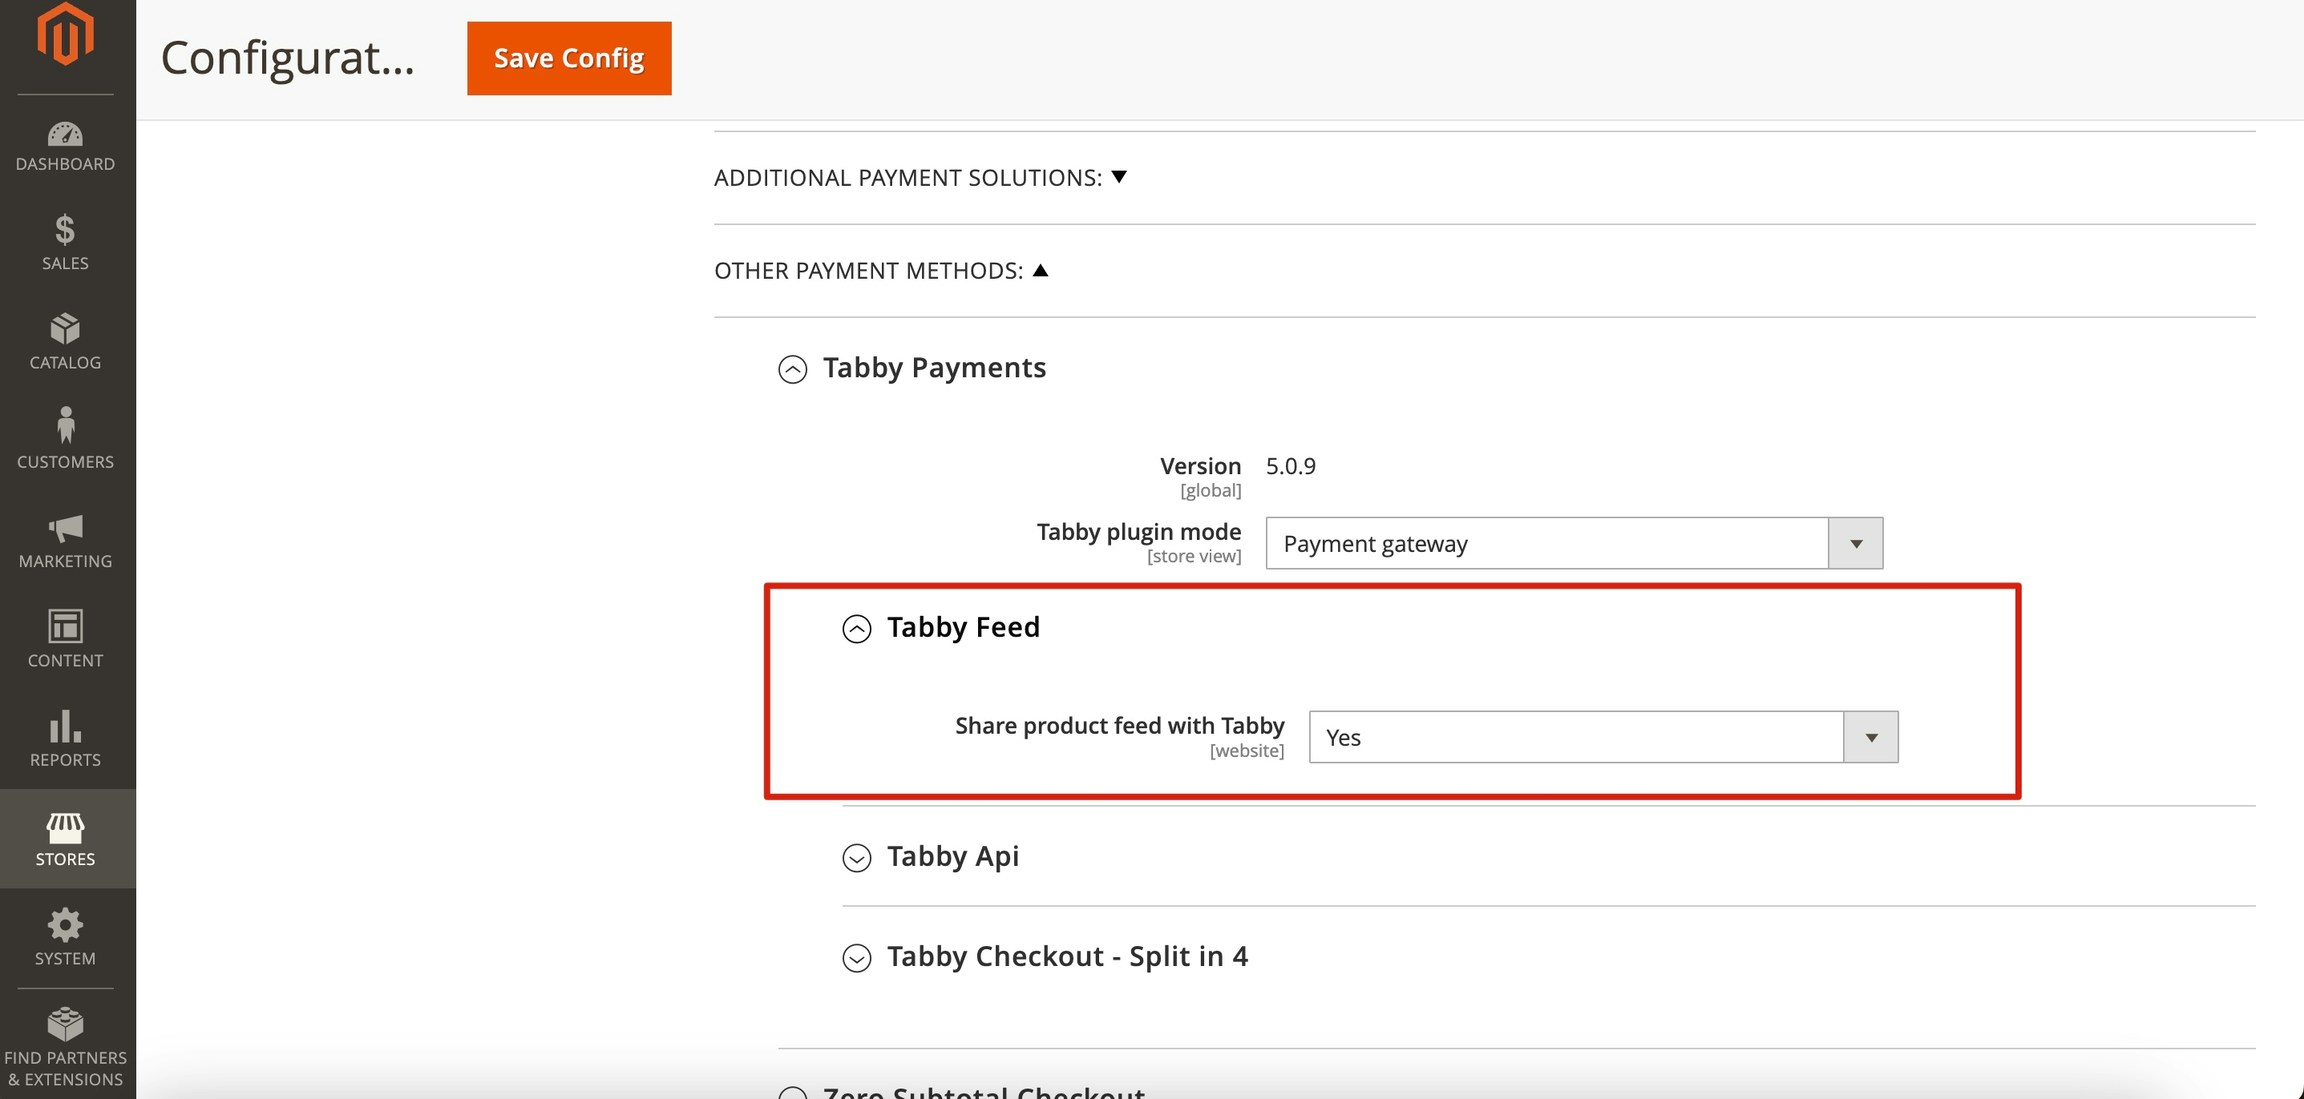
3. Go to **Tabby Feed** and configure the setting
 For multi-store setup - in case you use the same store\_code for different websites (different countries) you need to enable Use local currency on the checkout setting from Tabby API settings tab. Please inform your integration manager about such changes.
If these changes do not take effect immediately:
1. In the Magento admin panel, go to ***System > Cache Management***
2. Click **Flush Magento Cache**
3. Sign out
4. Sign back in to reset permissions
### Test Your Integration
After completing your integration, make an order and refund it (create a Credit Memo) to ensure that everything works as expected.
**Coordinate Testing with Tabby**
Before deploying Tabby integration to your production site, Tabby needs to validate the correctness of the integration. Contact your account manager to coordinate this test.
### Connect to the Live Tabby Environment
1. Get your Live Public and Secret keys for the live environment. Ask your account manager to share the keys.
2. Set your public and secret keys in the Magento admin panel, go to ***Stores > Configuration > Sales > Payment Methods > Tabby***
3. **Launch to Production**
For multi-store setup - in case you use the same store\_code for different websites (different countries) you need to enable Use local currency on the checkout setting from Tabby API settings tab. Please inform your integration manager about such changes.
If these changes do not take effect immediately:
1. In the Magento admin panel, go to ***System > Cache Management***
2. Click **Flush Magento Cache**
3. Sign out
4. Sign back in to reset permissions
### Test Your Integration
After completing your integration, make an order and refund it (create a Credit Memo) to ensure that everything works as expected.
**Coordinate Testing with Tabby**
Before deploying Tabby integration to your production site, Tabby needs to validate the correctness of the integration. Contact your account manager to coordinate this test.
### Connect to the Live Tabby Environment
1. Get your Live Public and Secret keys for the live environment. Ask your account manager to share the keys.
2. Set your public and secret keys in the Magento admin panel, go to ***Stores > Configuration > Sales > Payment Methods > Tabby***
3. **Launch to Production**
After you’ve connected to the live environment and we’ve tested your integration, you’re ready to deploy to your production environment and offer Tabby payment methods to your customers.
## Specific Settings
### No Price snippet
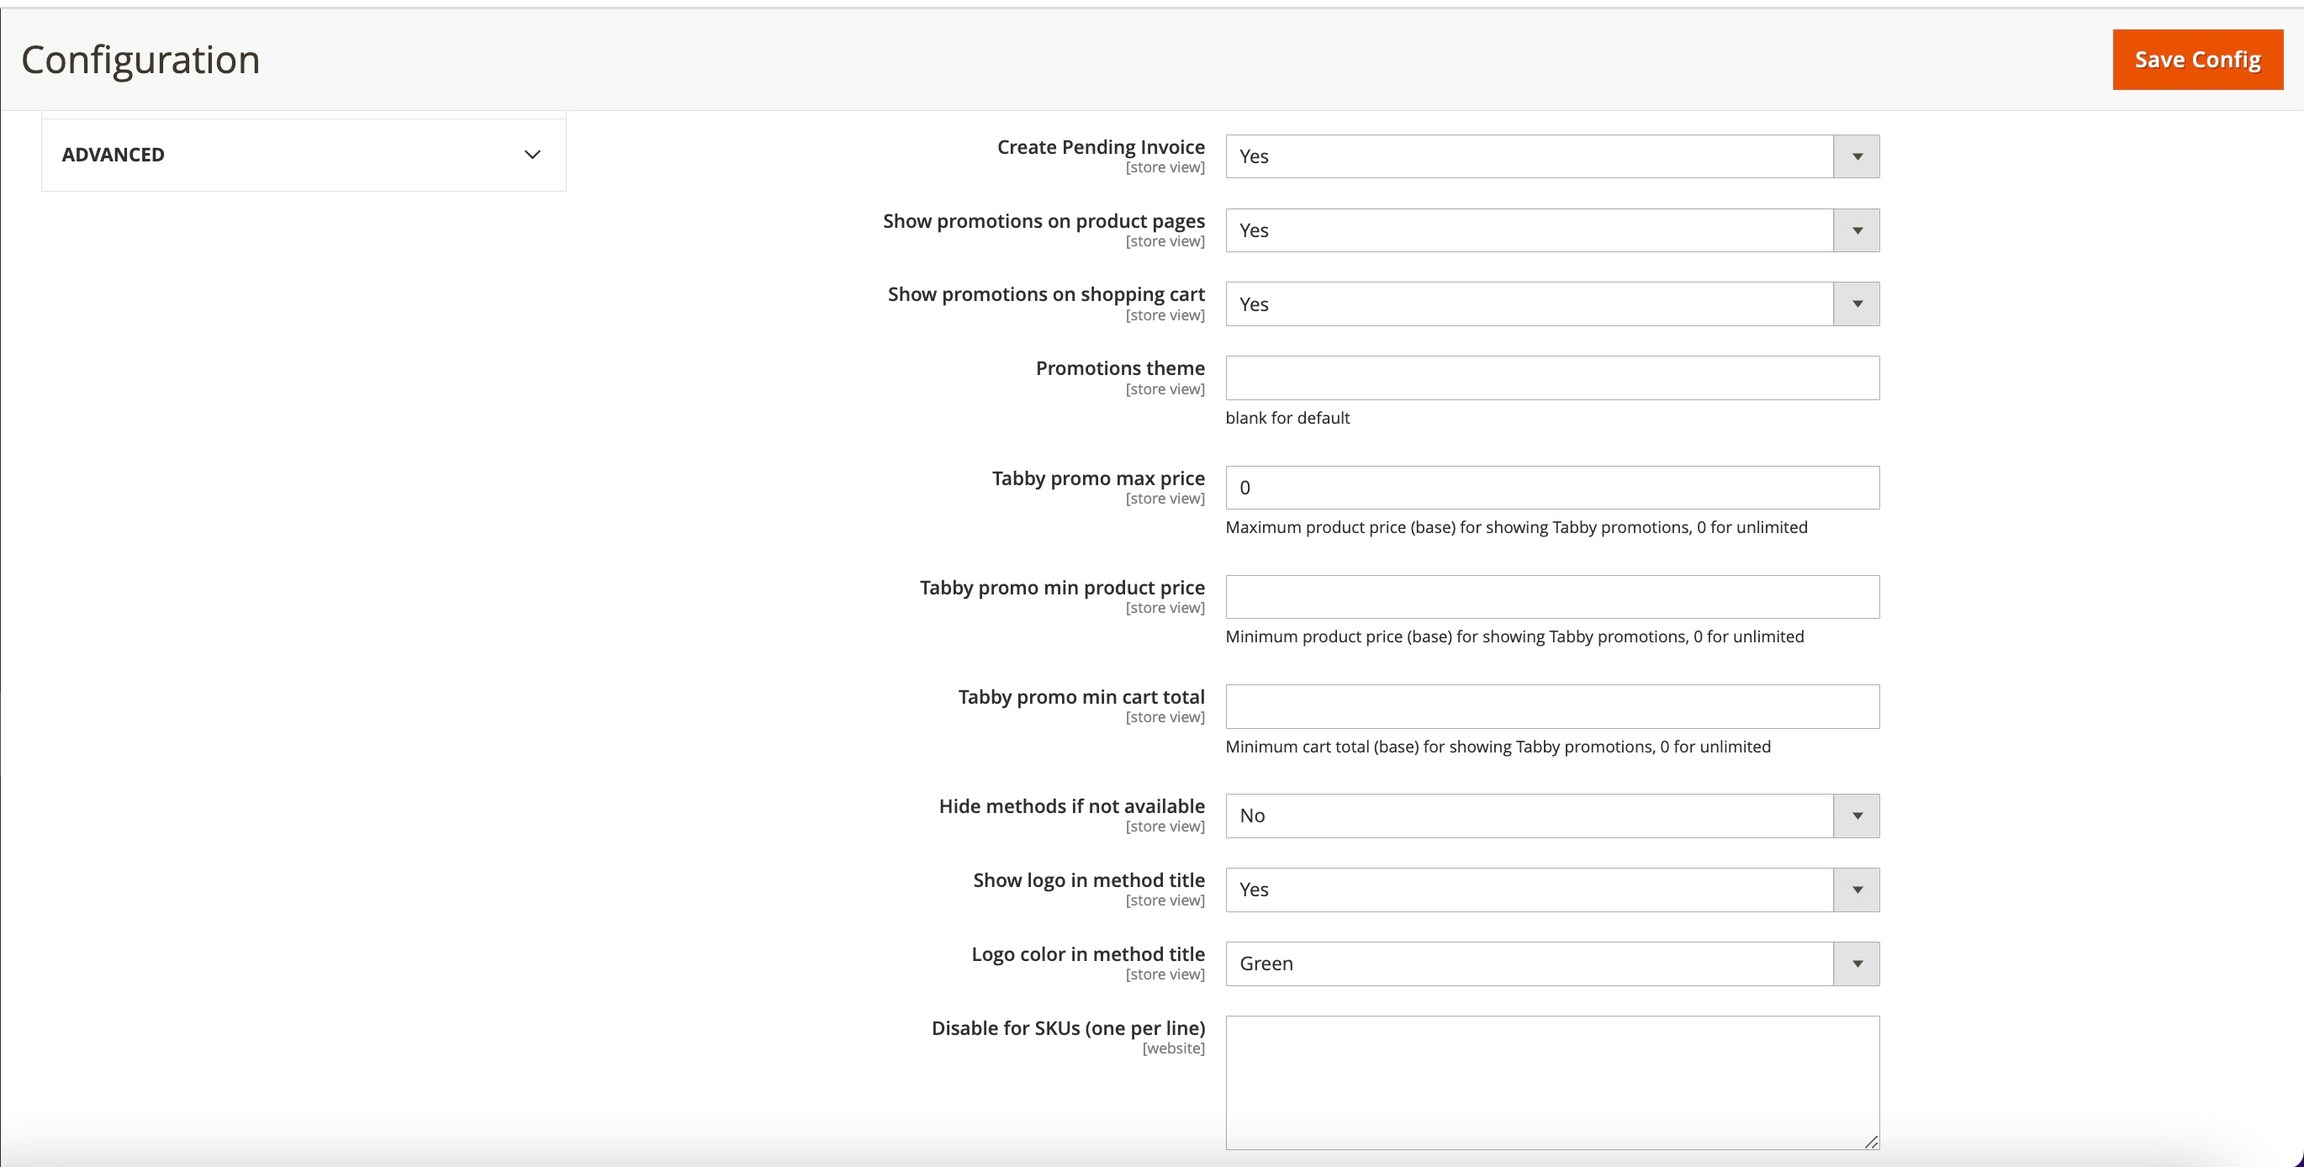
It is possible to turn on non-standard Tabby snippets in ***Stores > Configuration > Sales > Payment Methods > Tabby***, parameter ***Promotions theme*** should have **:non-standard** specified:
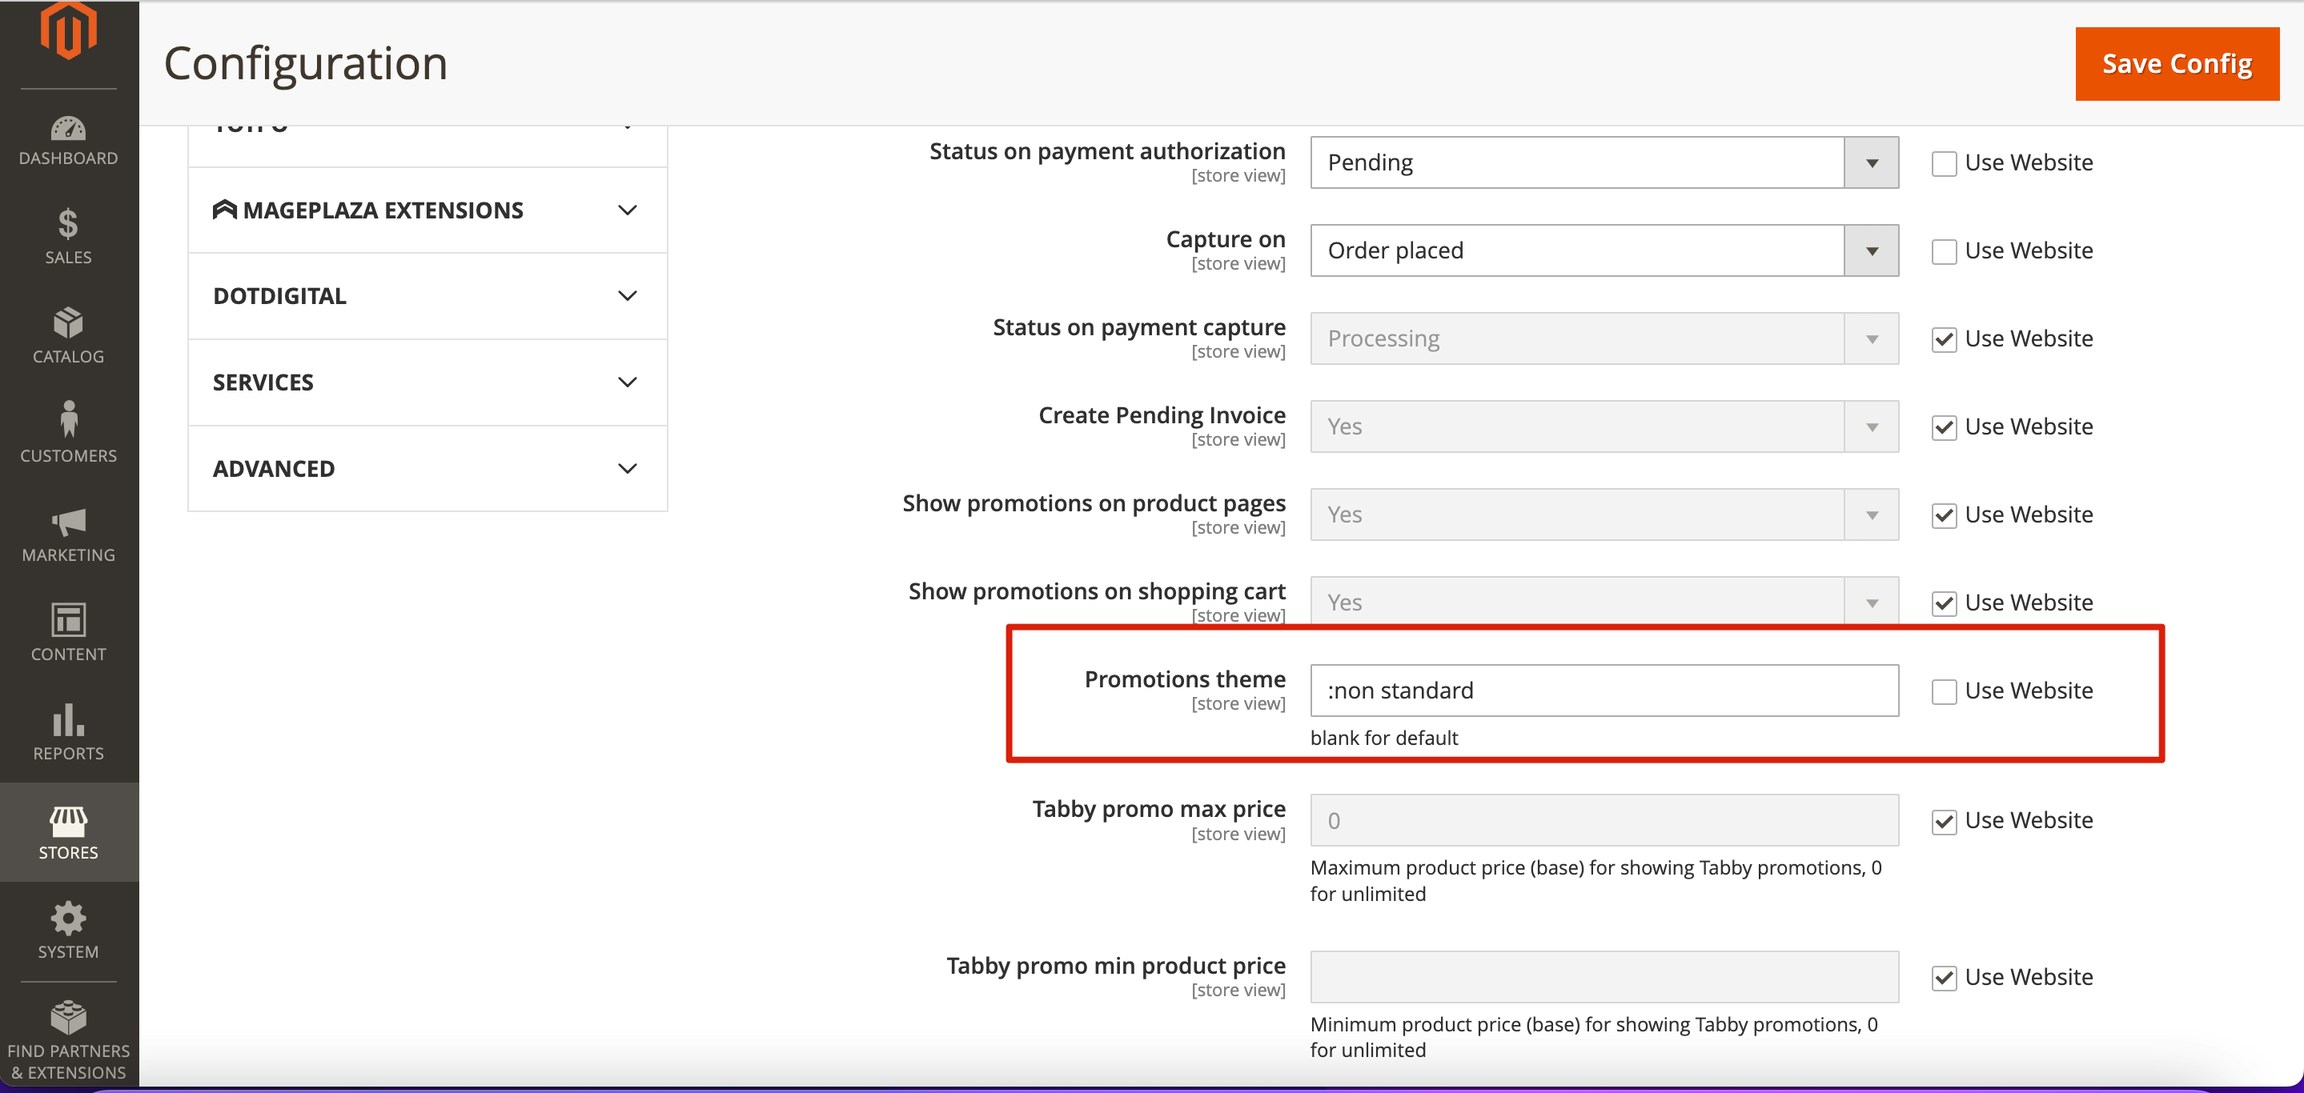
Promotions theme
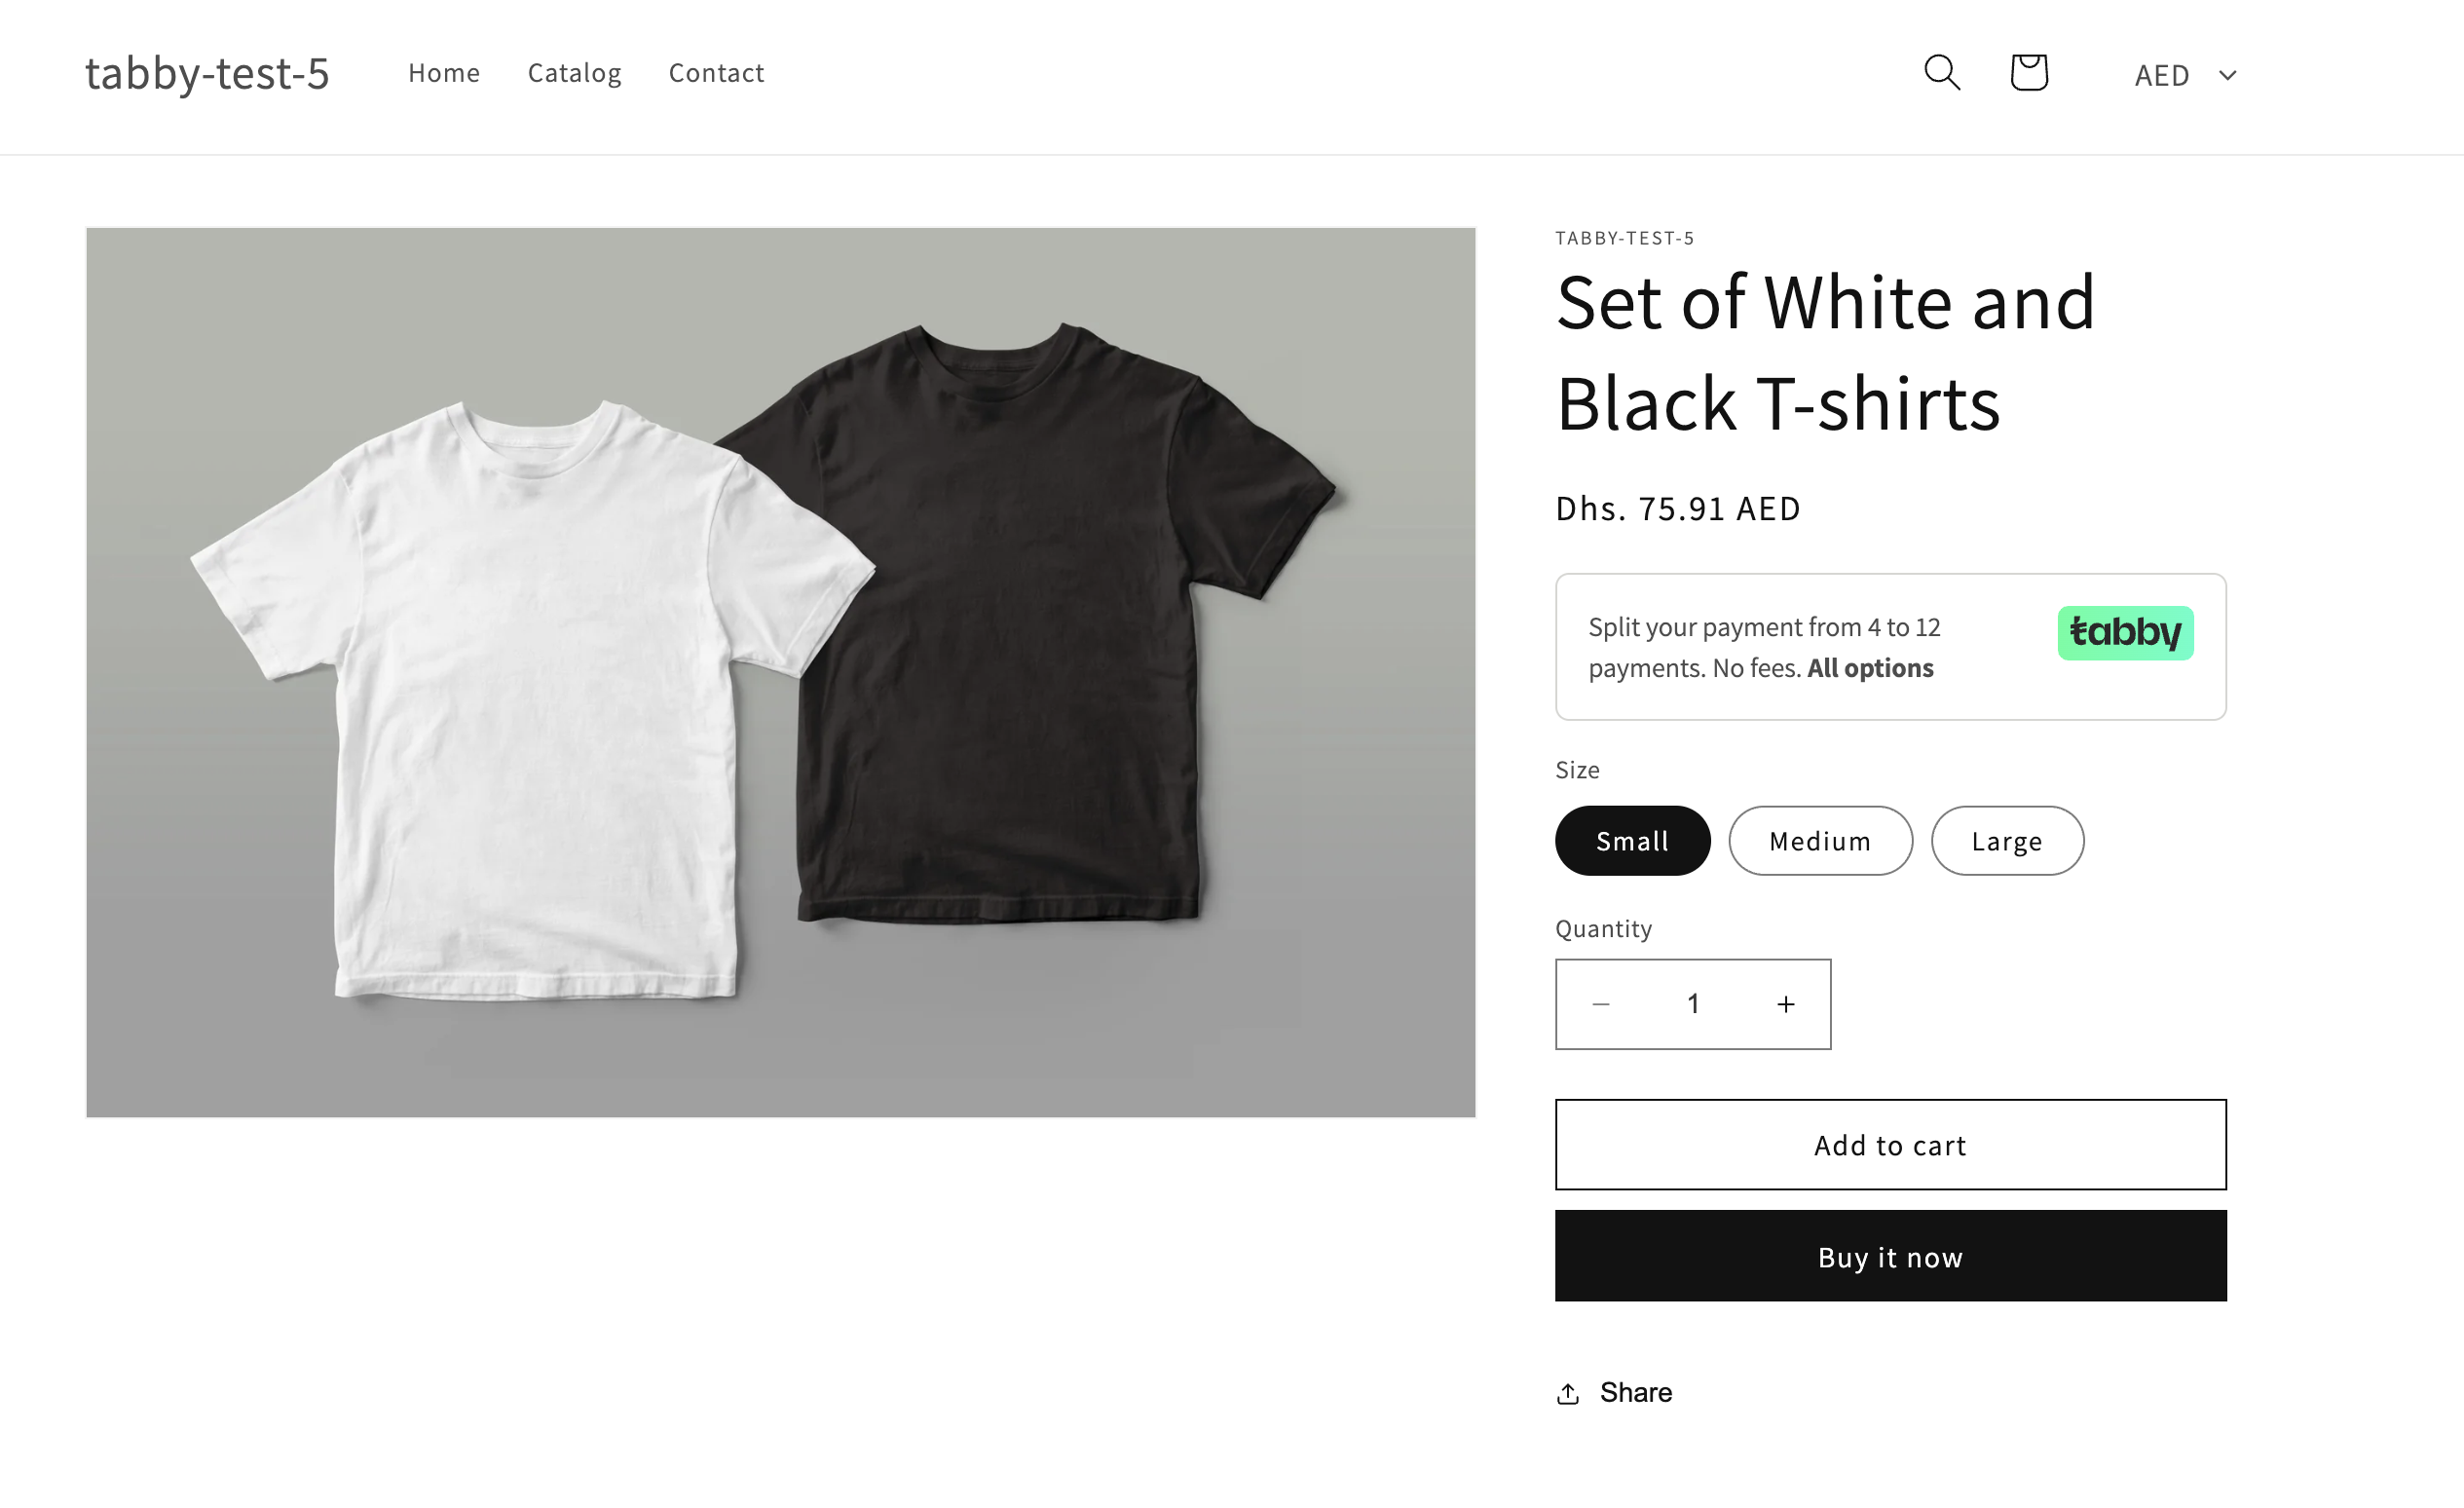
No price snippet
### Promotions Only Mode
It is possible to set Tabby plugin for promotion purposes only if Checkout integration was done with another provider: the plugin will only enable PDP / Cart page snippets.
For this setup go to ***Stores > Configuration > Sales > Payment Methods > Tabby***, parameter ***Tabby plugin mode***, and select ***Promotions only*** there:
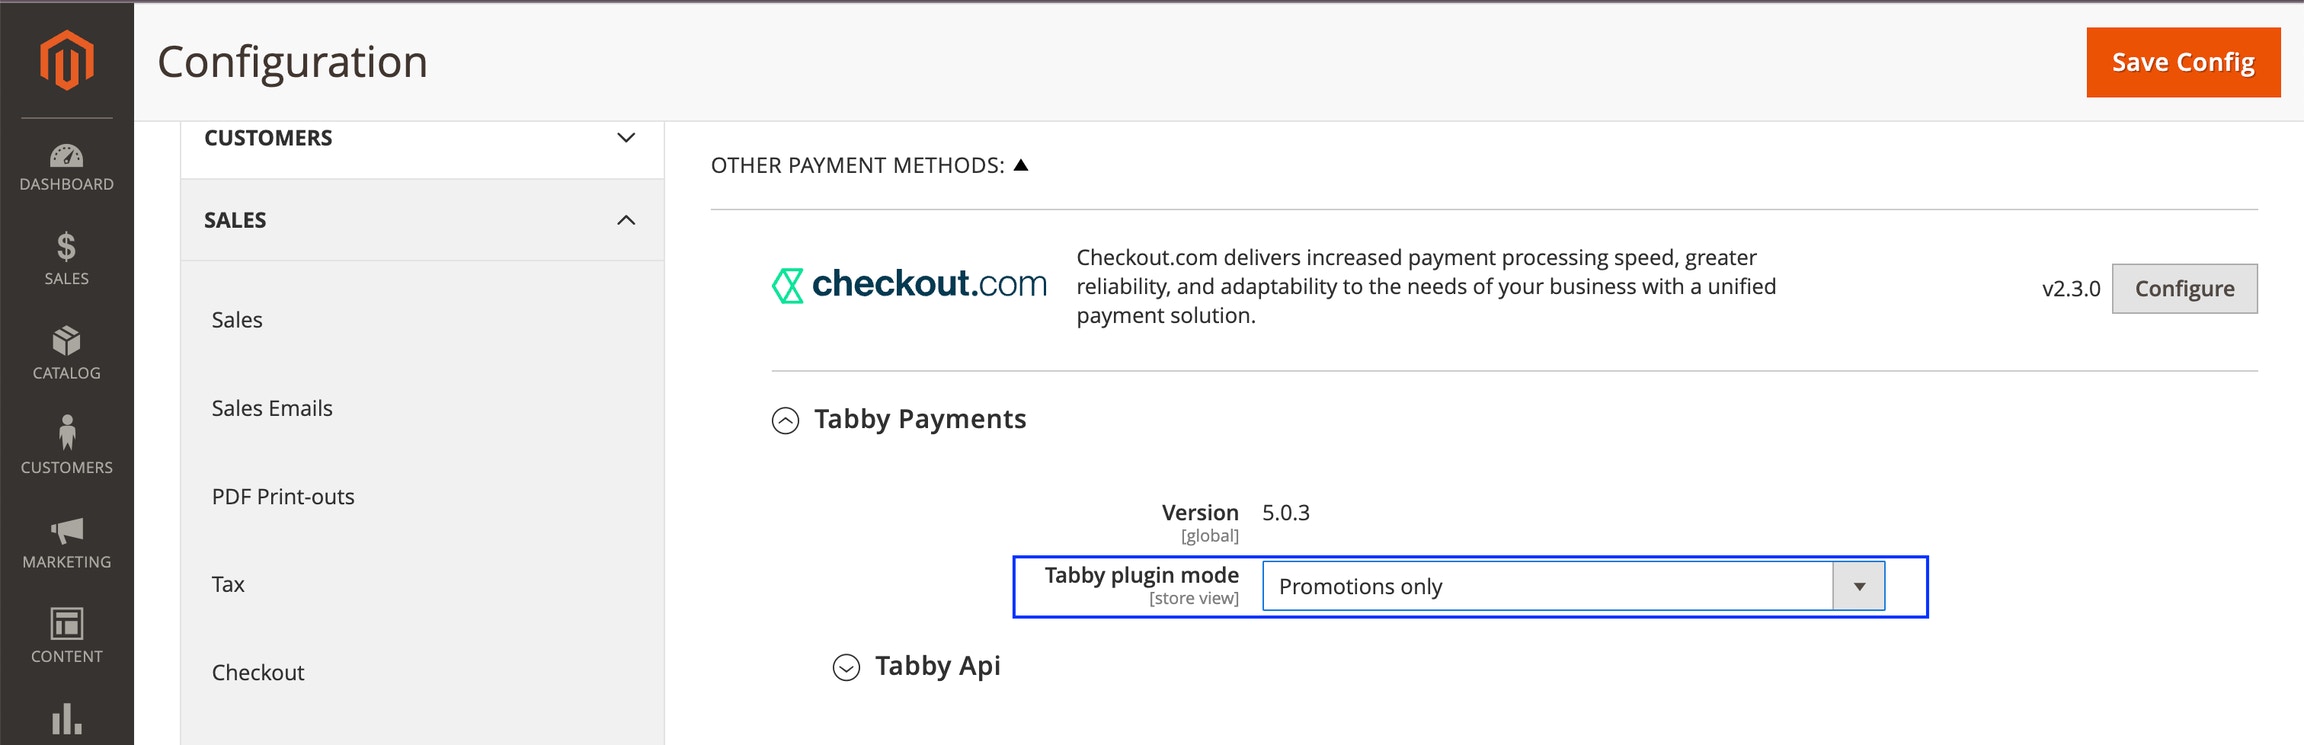
Promo only mode