Tabby works on the OpenCart platform for all supported countries. OpenCart versions 2.x, 2.1.x, and 3.x with the Journal Theme are supported.
Installation Steps
Install the OpenCart Extension
- Go to Extensions -> Installer and install the extension.
- Go to Extensions -> Modifications and click the refresh button under your profile (without re-loading this page in the browser).
- Check the Tabby payment in the modification list.
- Go to Extensions -> Extensions -> Modules in your OpenCart admin panel and activate Tabby Module.
Optional: Updating the OpenCart Extension
When you want to update your current version with the new one.- Go to Extensions -> Modifications and delete the Tabby payment
- Go to Extensions -> Installer and delete all files named oc3-tabby-x.x.x.ocmod.zip from install history
- Upload and install the extension
- Go to Extensions -> Modifications and click the refresh button under your profile (without reloading the page in the browser)
- Check the Tabby payment in the modification list;
- Go to Extensions -> Extensions -> Modules in your Opencart admin panel and activate Tabby Module
- Open Tabby Module settings and click on Save changes button
Configure Tabby as a Payment Method
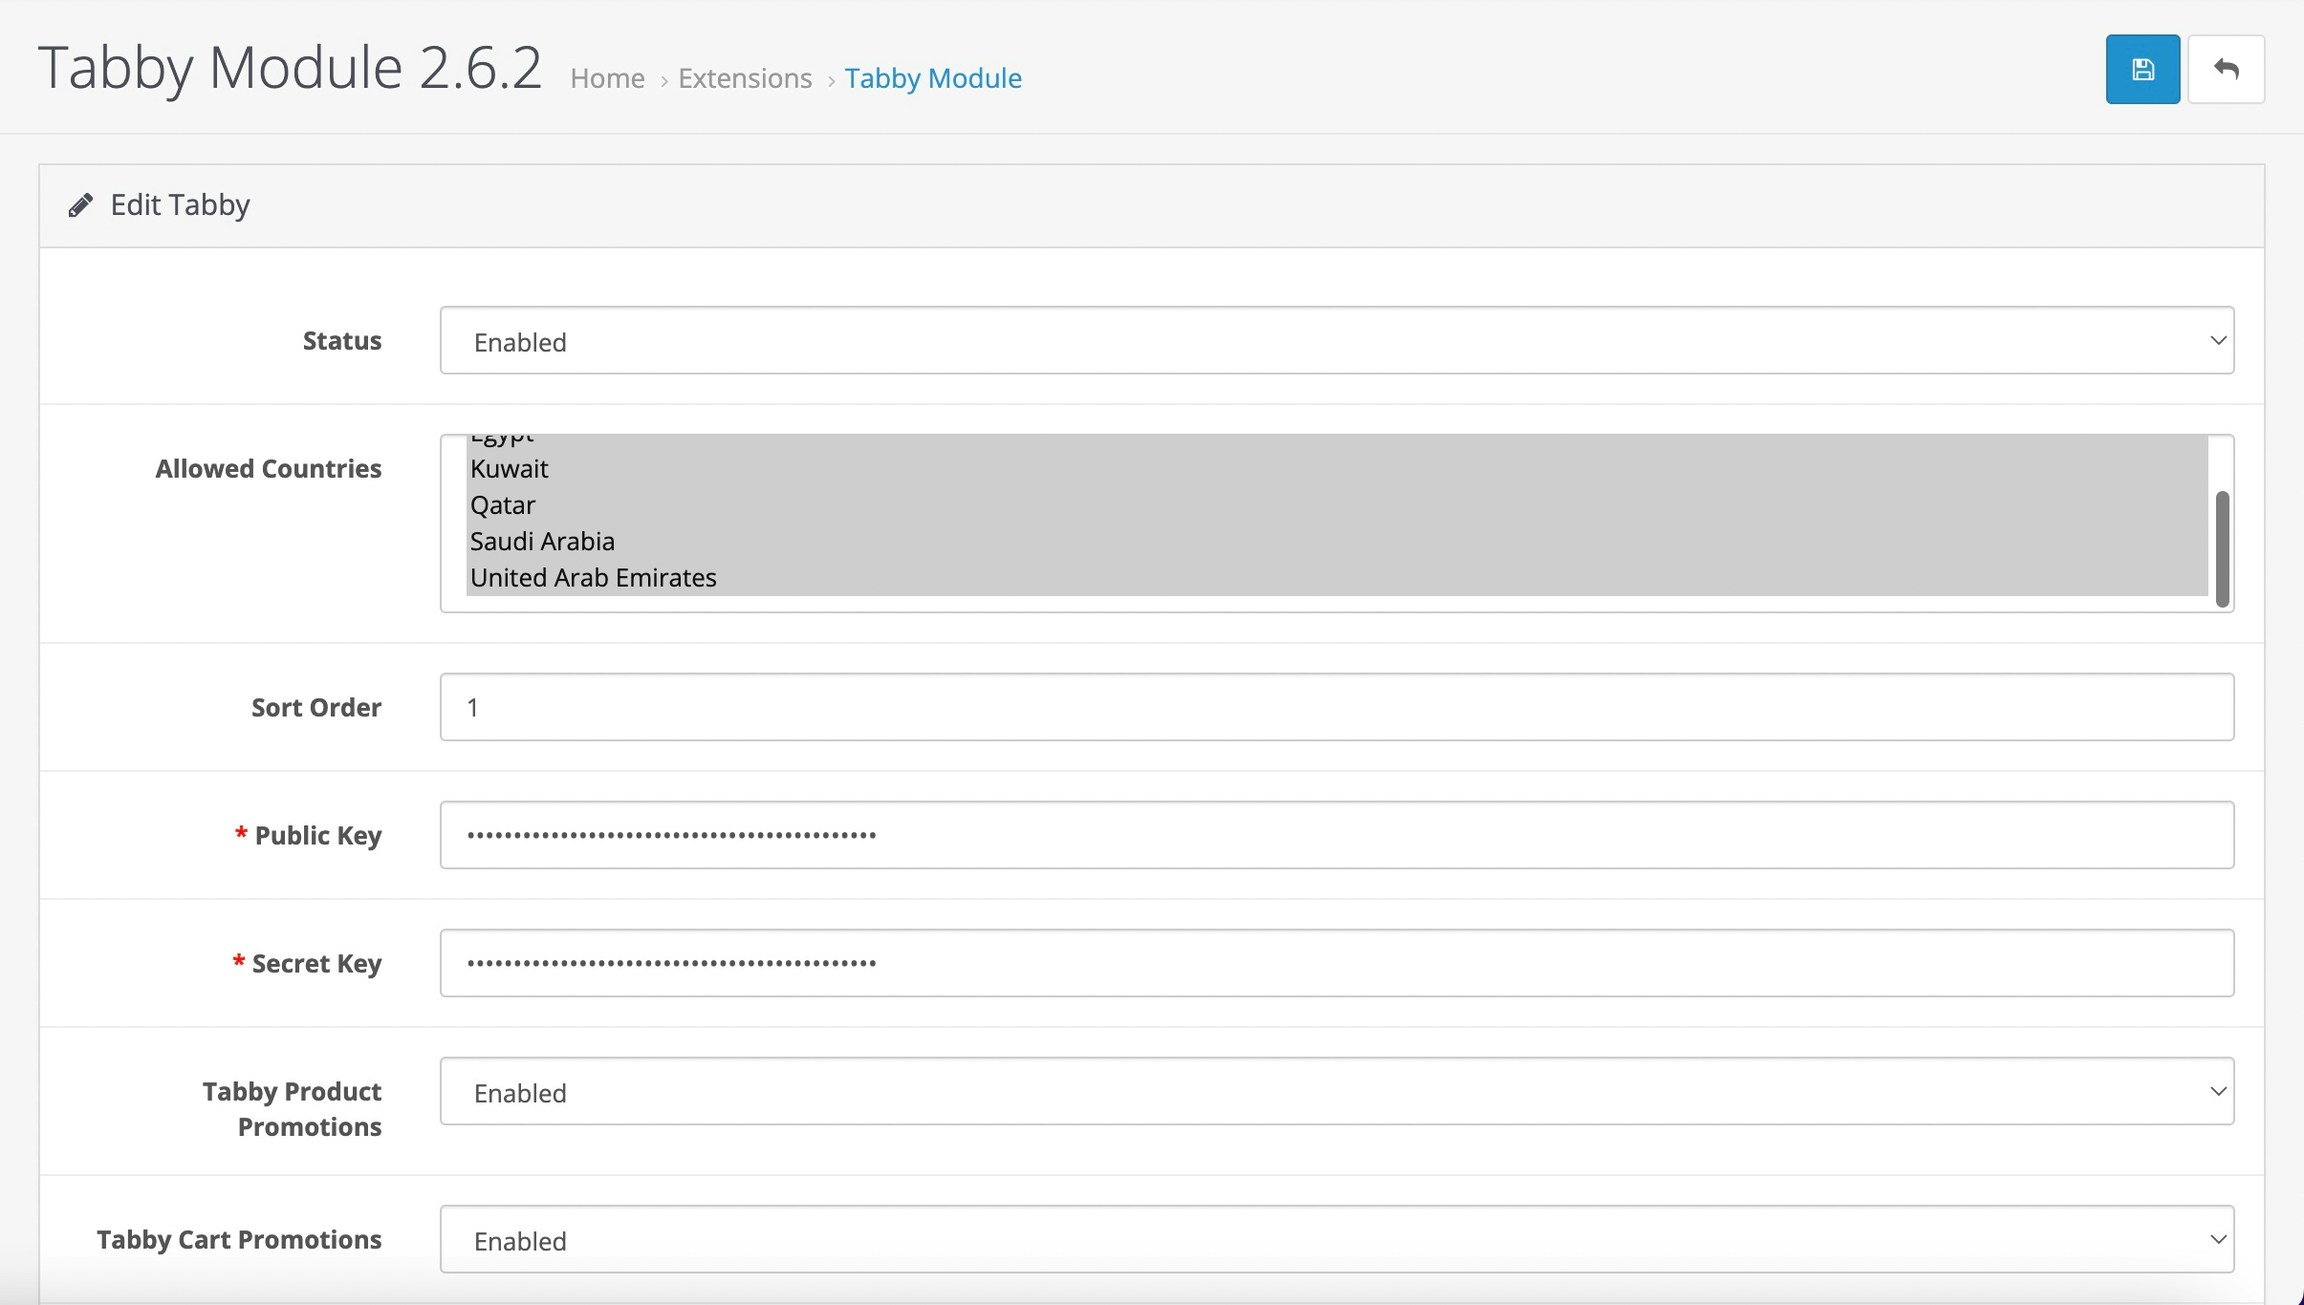
- Go to Extensions -> Extensions -> Modules in your OpenCart admin panel, find Tabby Module, click “Edit” and enter the Public API Key and Secret API Key for testing.
- Go to Extensions -> Extensions -> Payments in your OpenCart admin panel and enable Tabby Installments (Split in 4).
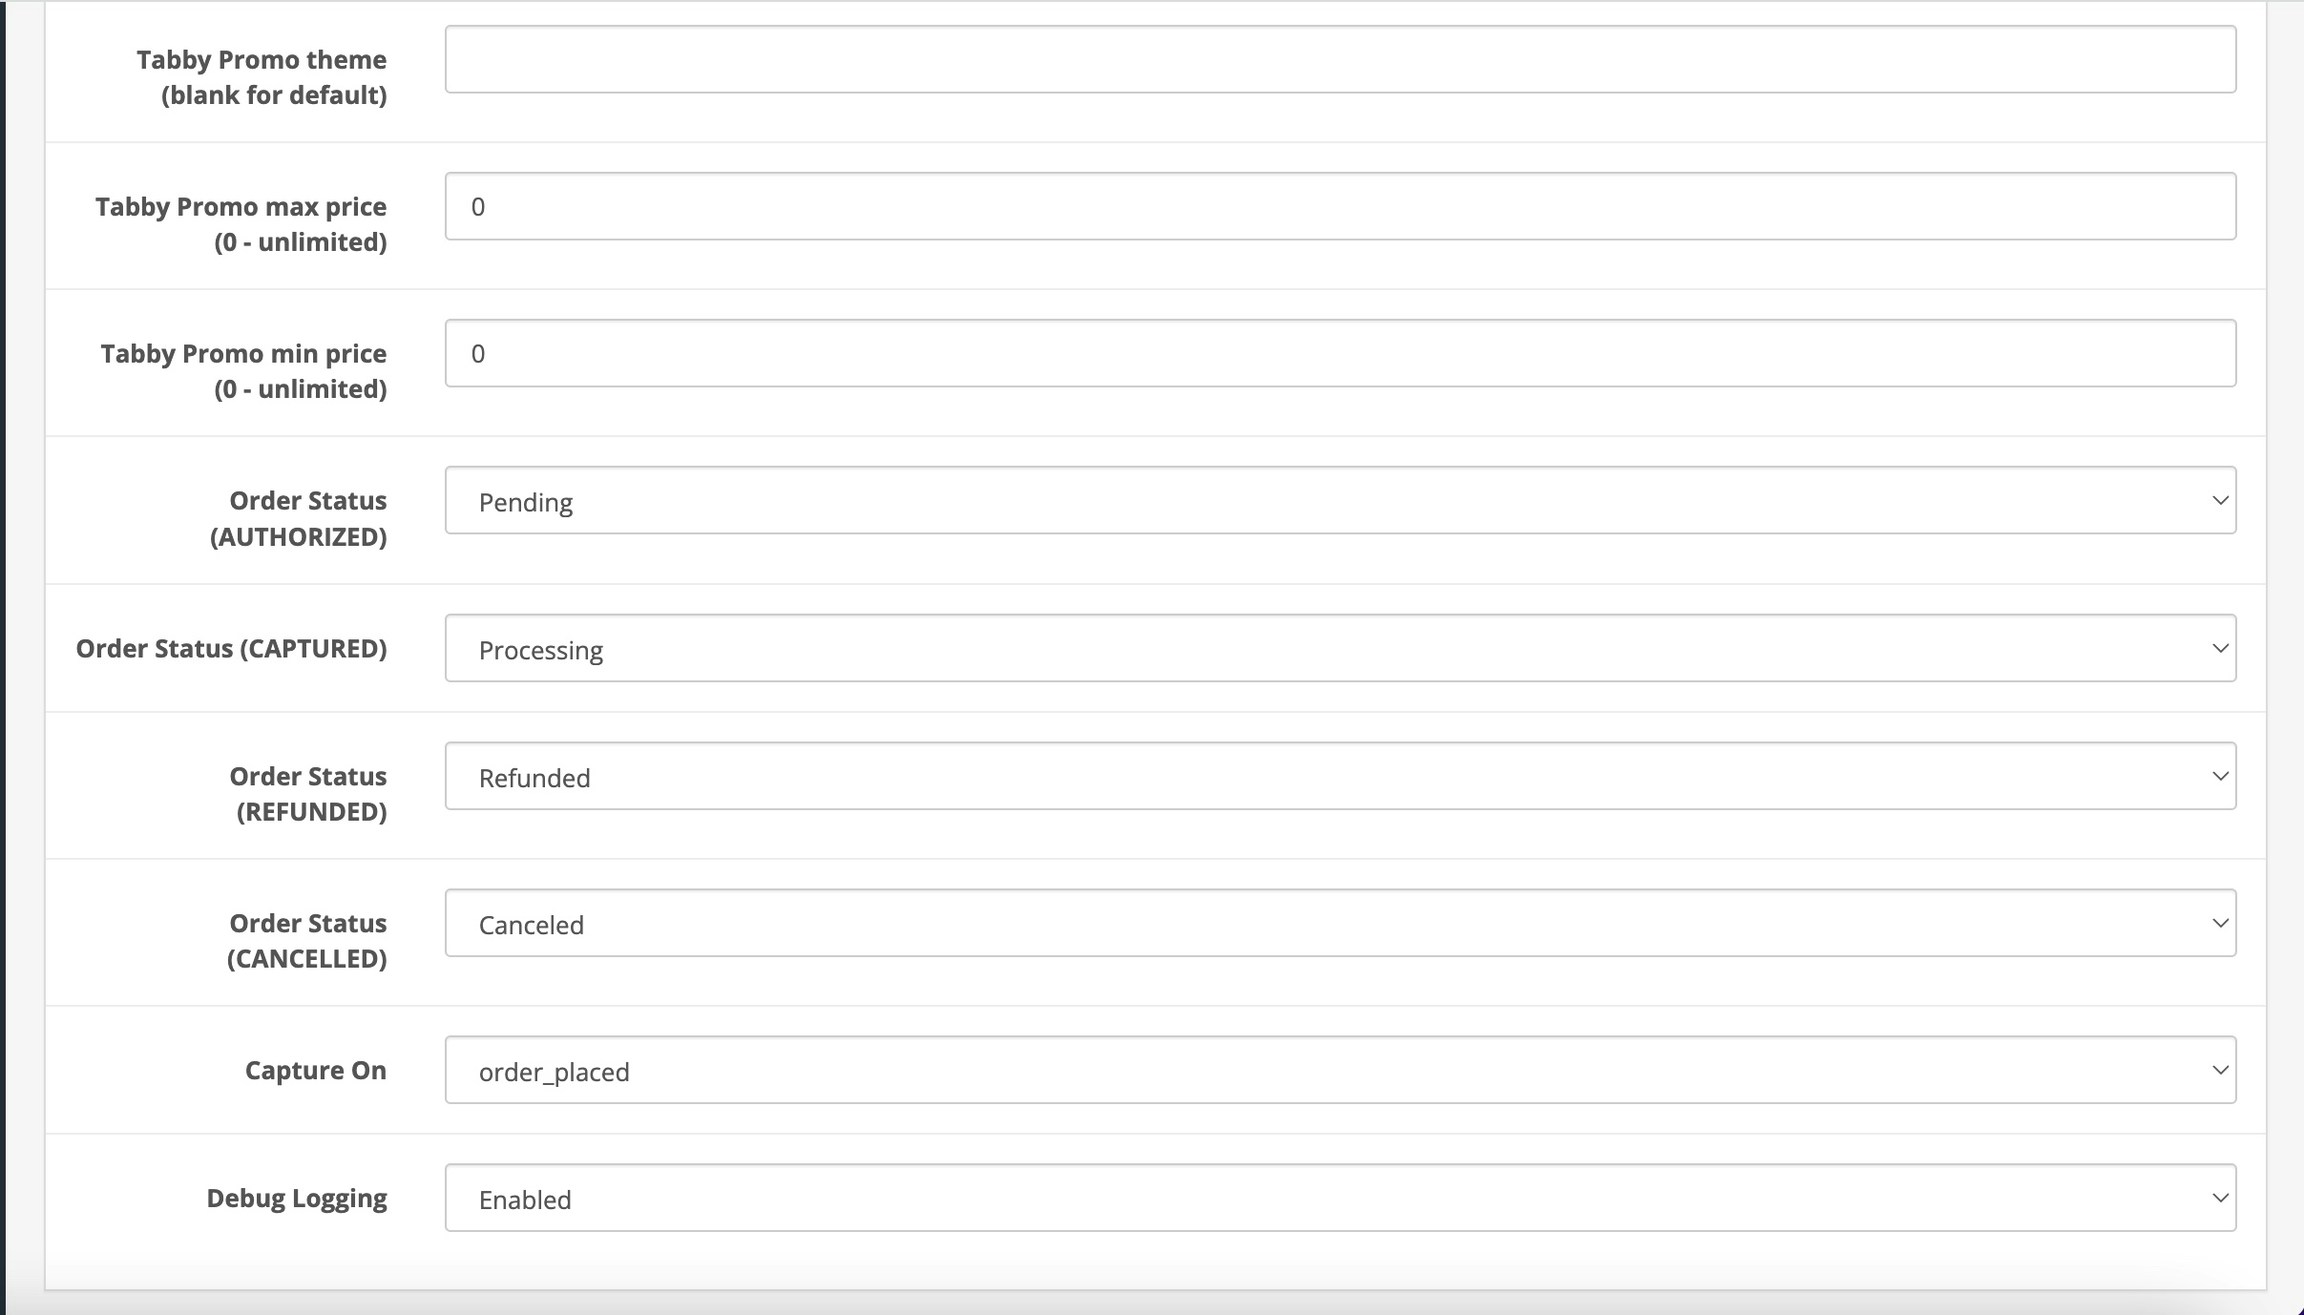
- Make sure the following settings are configured in any Tabby option Installments: – Capture on – order_placed
- Go to Design -> Layouts -> Checkout and add Tabby Module to Content Top
Test Your Integration
After completing your integration, make an order and refund it to ensure that everything works as expected. Coordinate Testing with Tabby Before deploying Tabby integration to your production site, Tabby needs to validate the correctness of the integration. Contact your account manager to coordinate this test.Connect to live Tabby environment
- Get your public and secret keys for the live environment. Ask you account manager to share the keys.
- Set your live public and secret keys in the OpenCart admin panel, for this go to Extensions -> Extensions -> Modules -> Tabby Module in your OpenCart admin panel.
- Launch to Production
After you’ve connected to the live environment and we’ve tested your integration, you’re ready to deploy to your production environment and offer Tabby payment methods to your customers.
Specific settings
No Price snippet
It is possible to turn on non standard Tabby snippets in Extensions -> Extensions -> Modules -> Tabby module (Tabby Checkout), parameter Tabby Promo theme should have :non standard specified: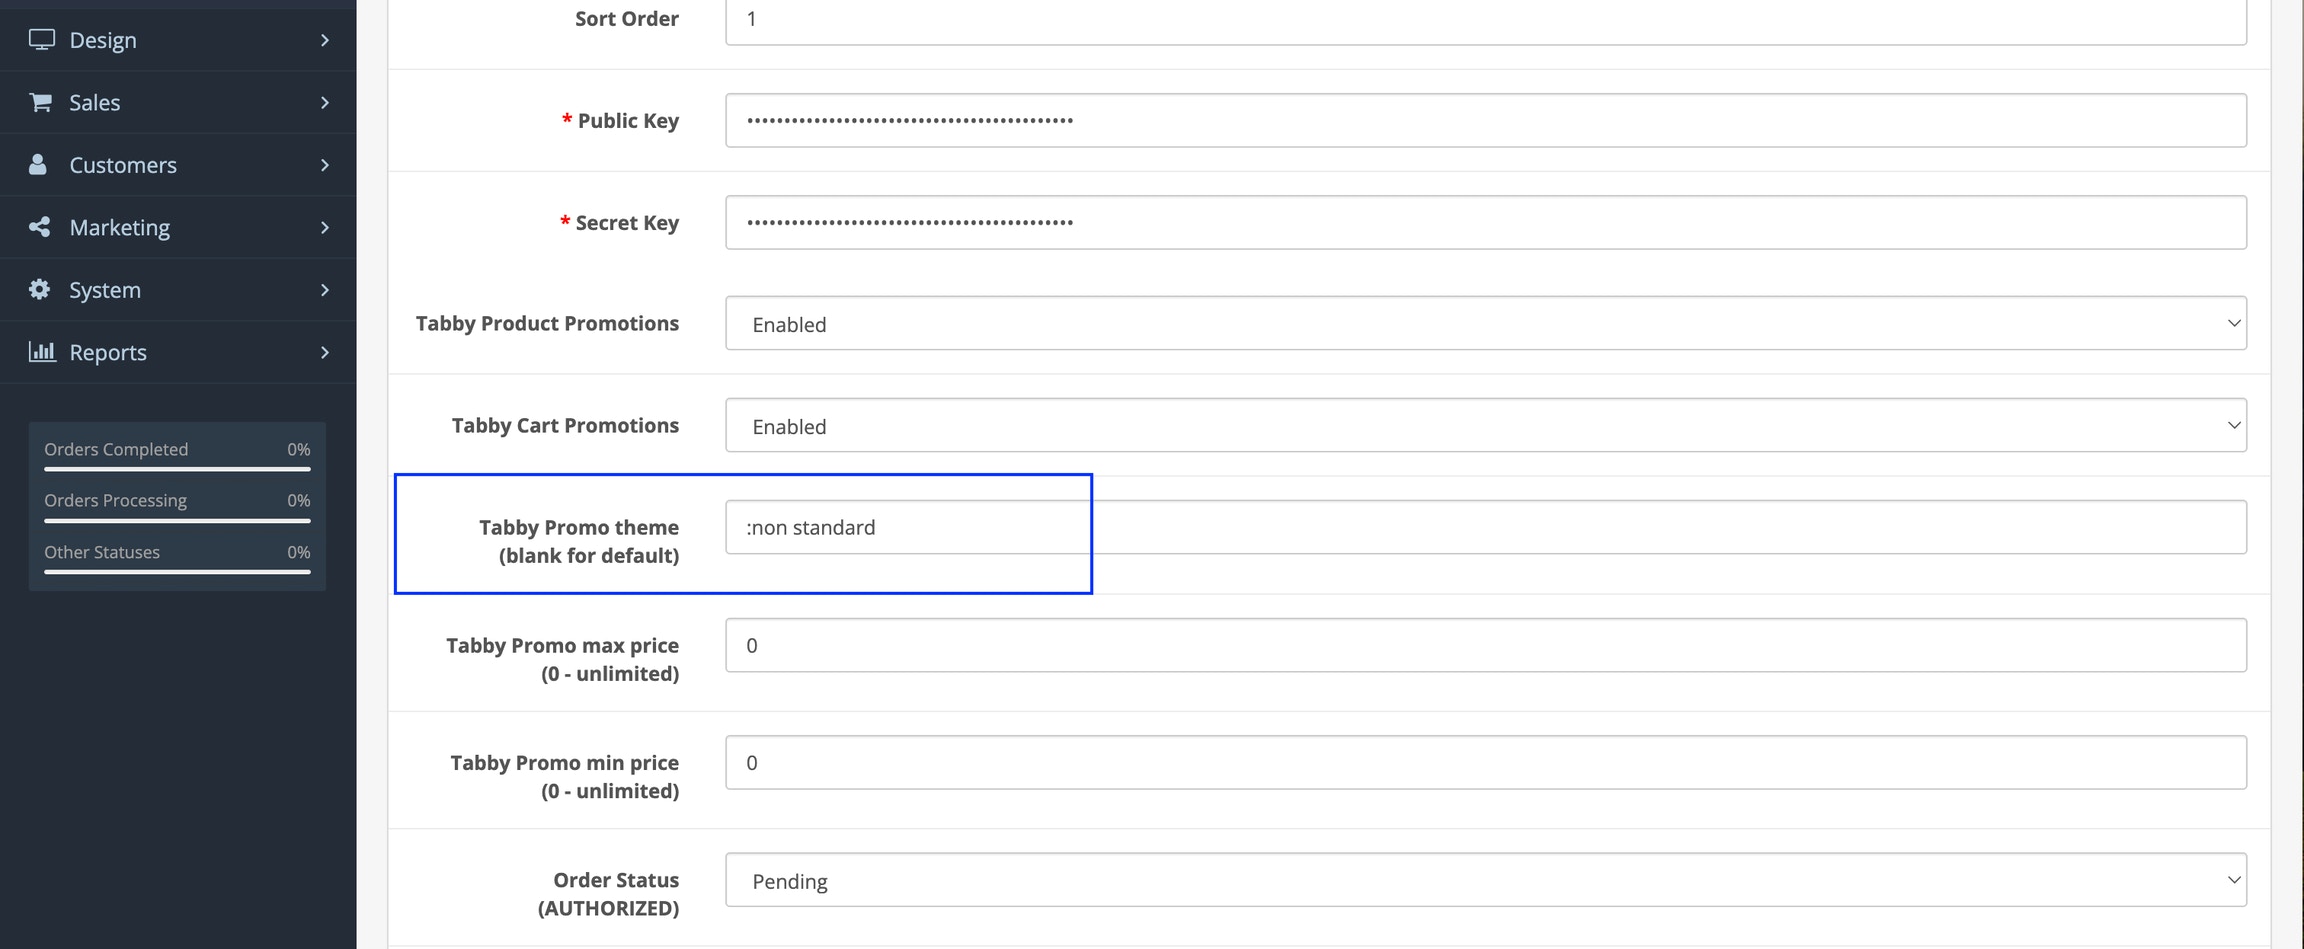
Promotions theme
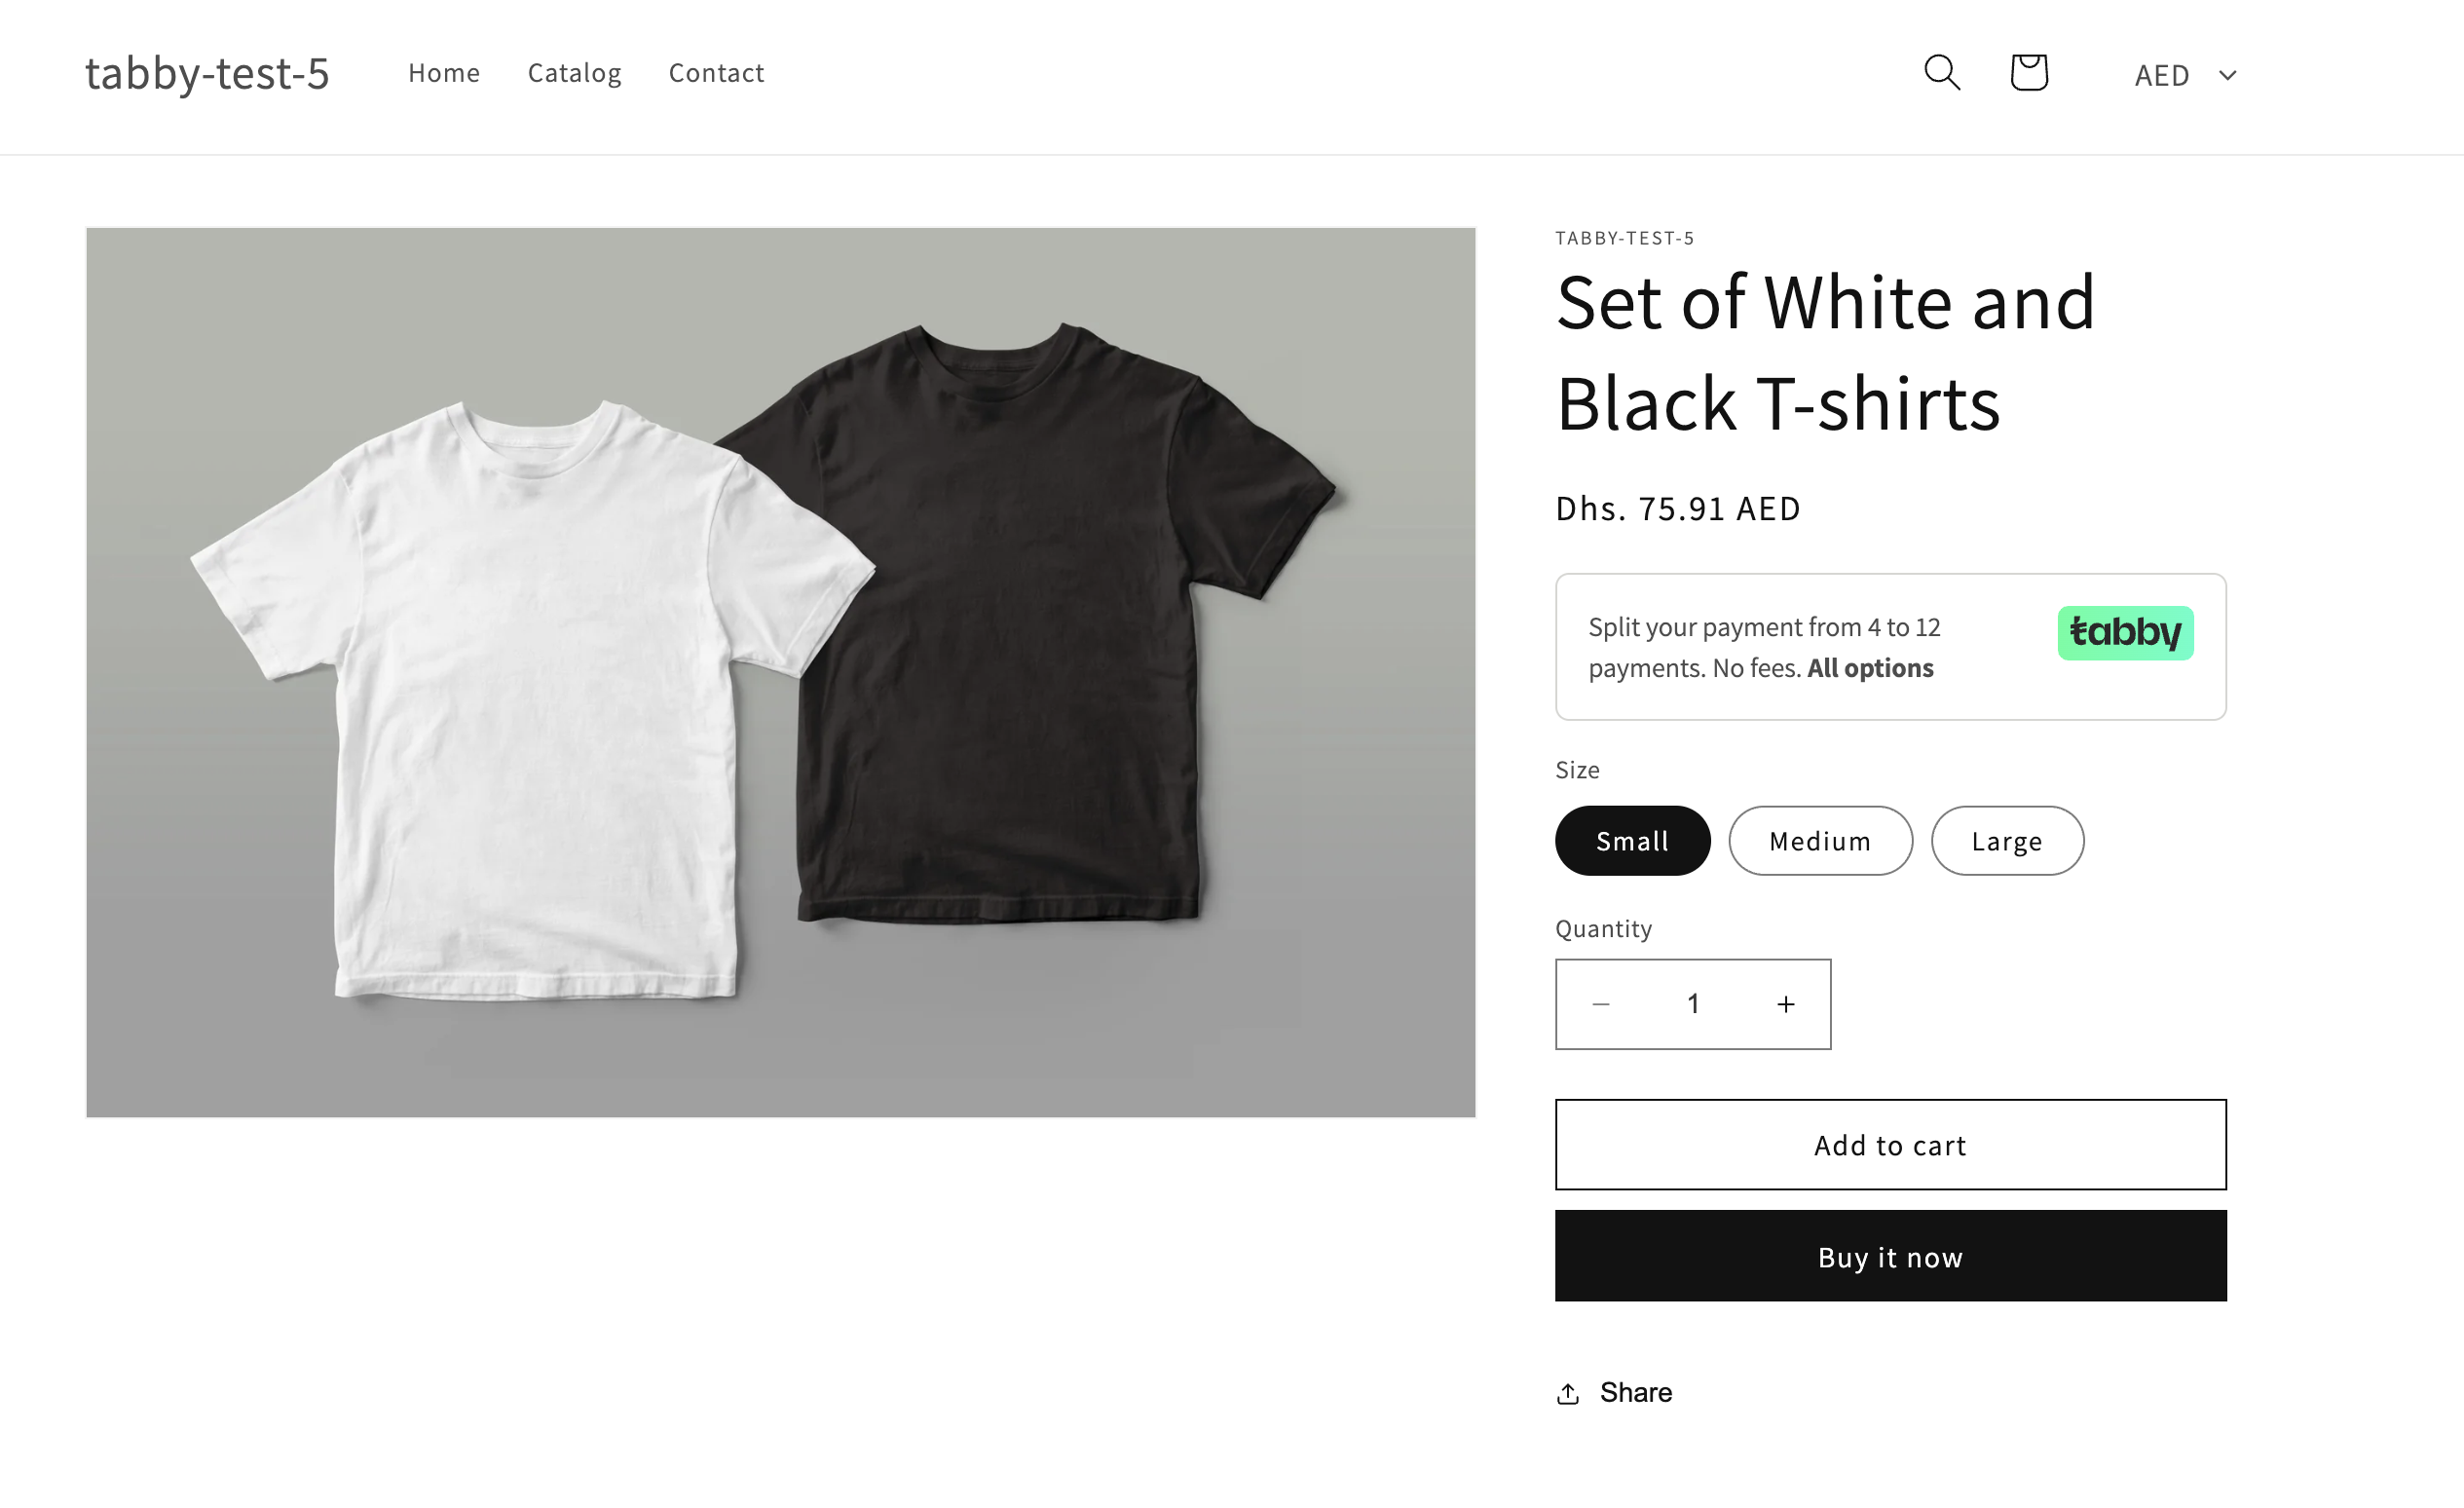
No price snippet