KSA merchants: Use
checkout.tabby.sa instead of checkout.tabby.ai in all snippet script URLs below. See Base URLs.
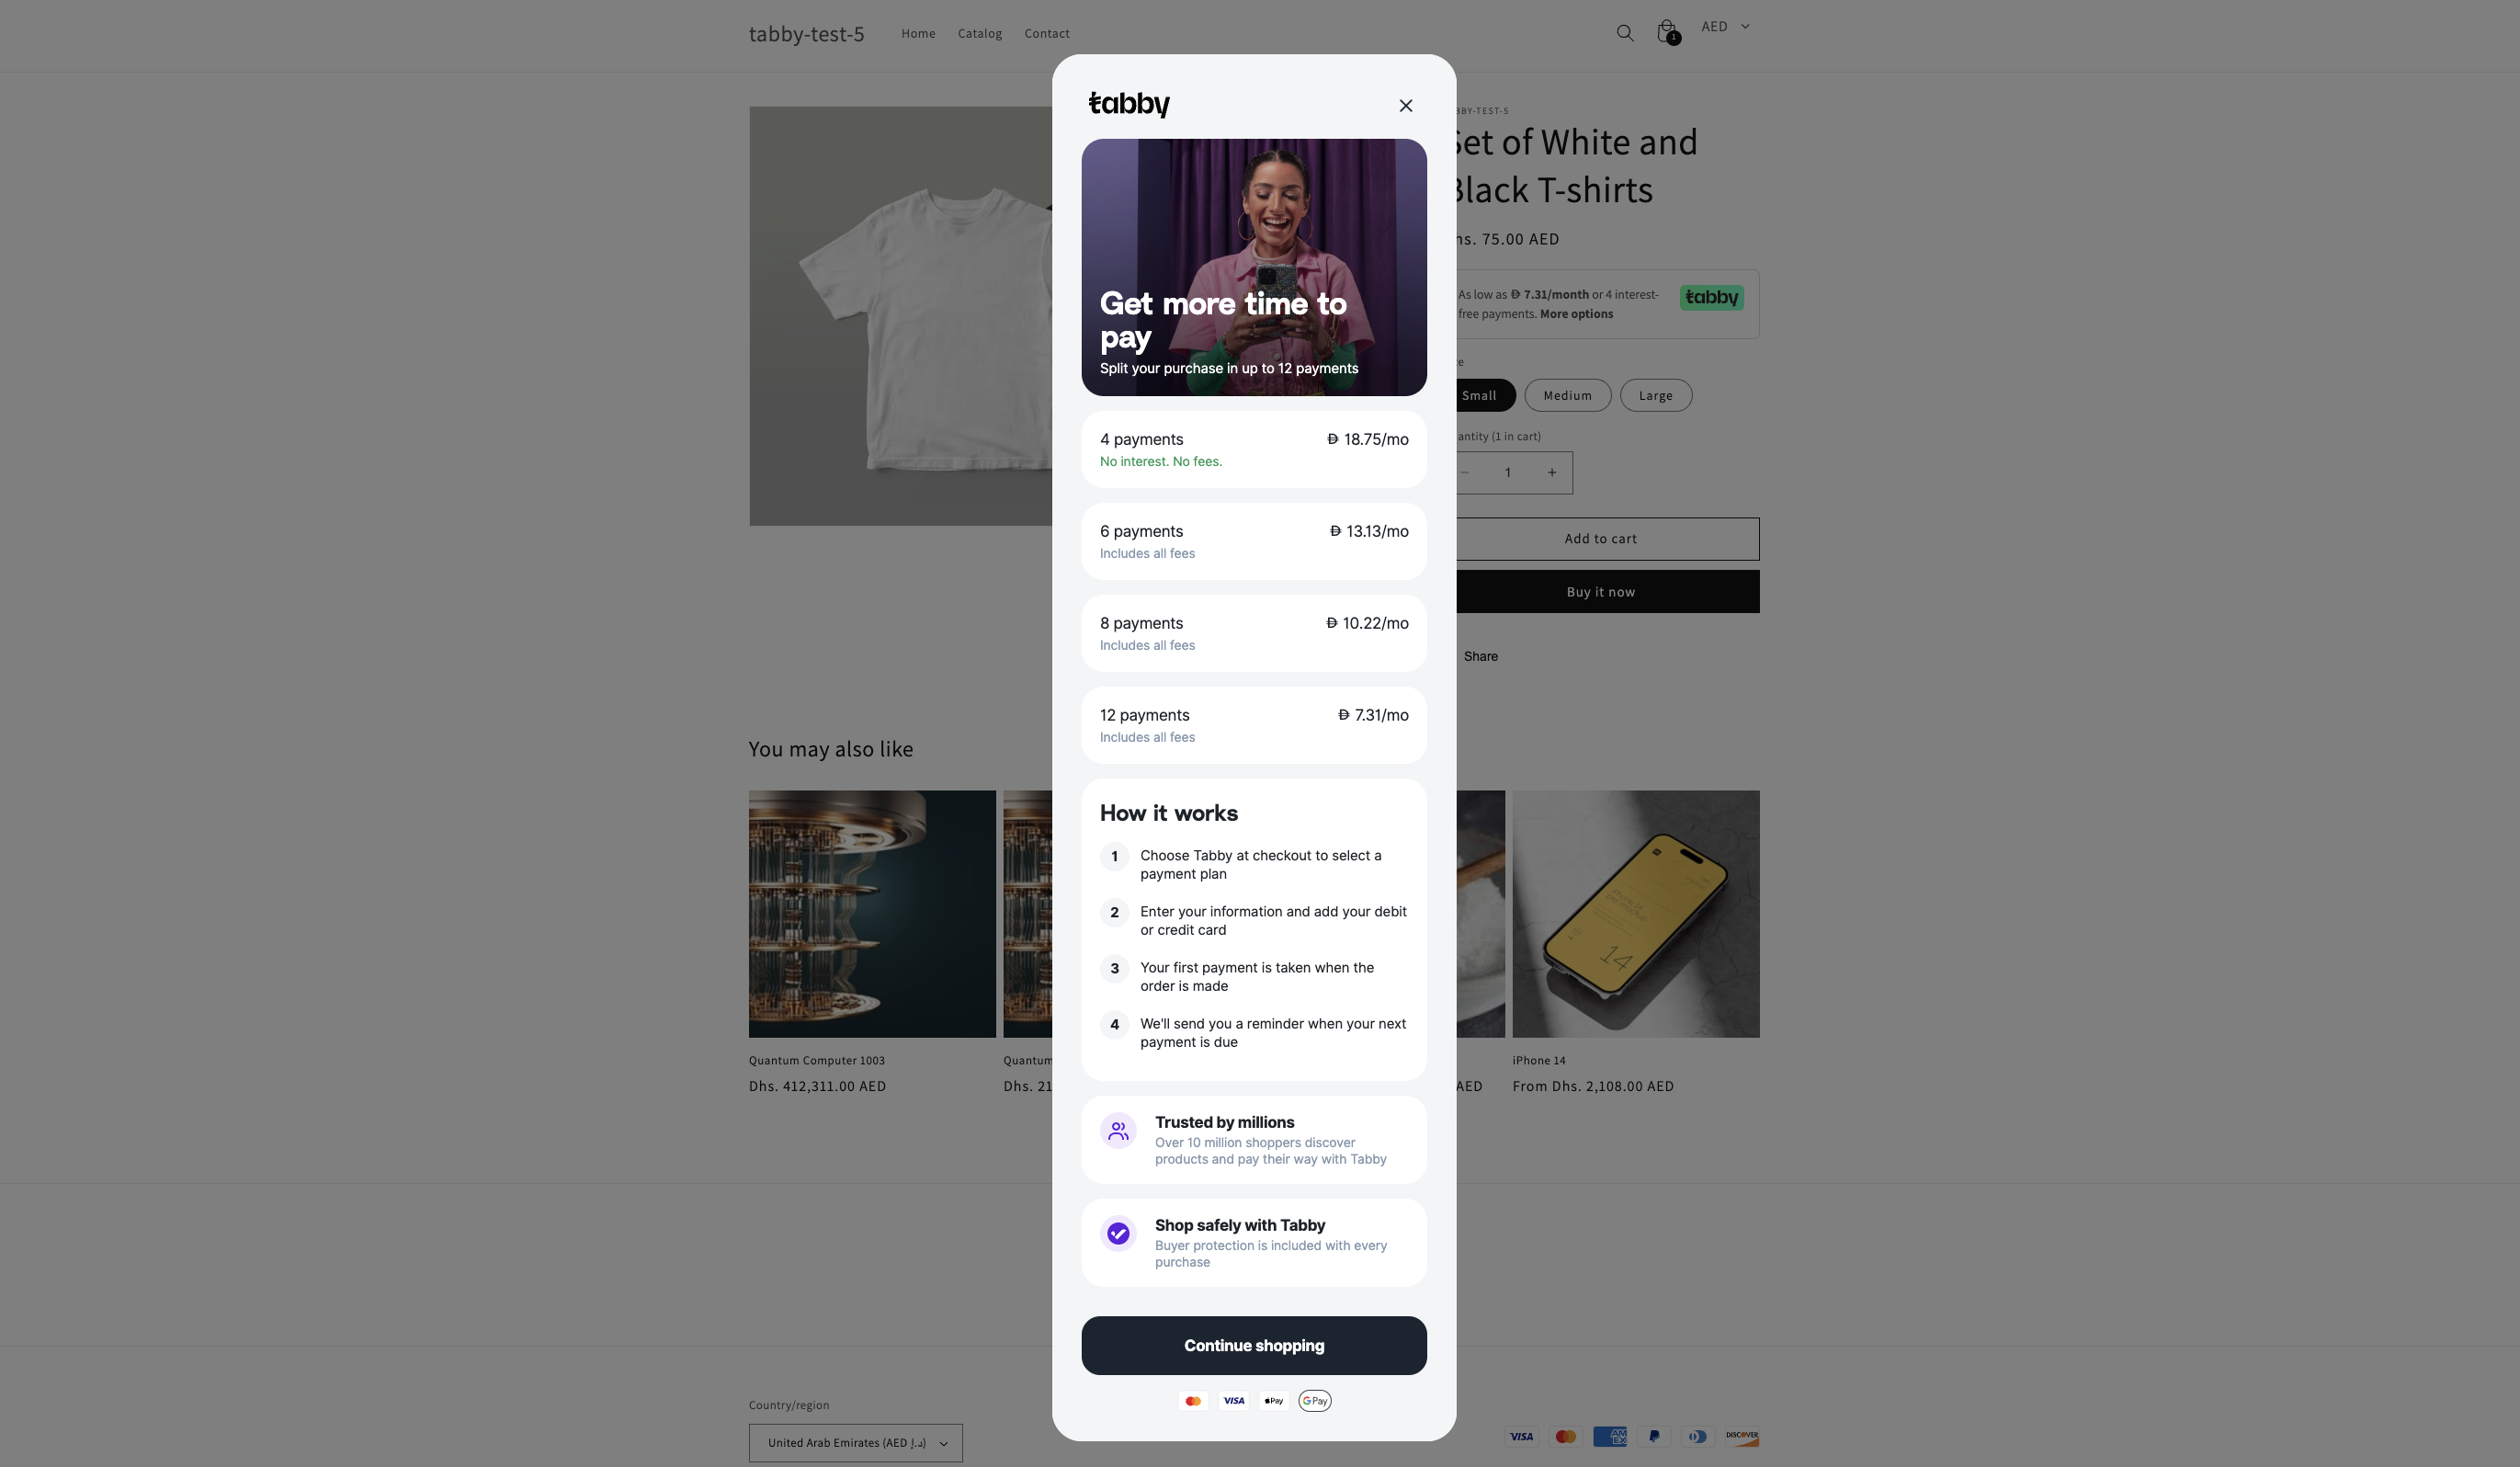

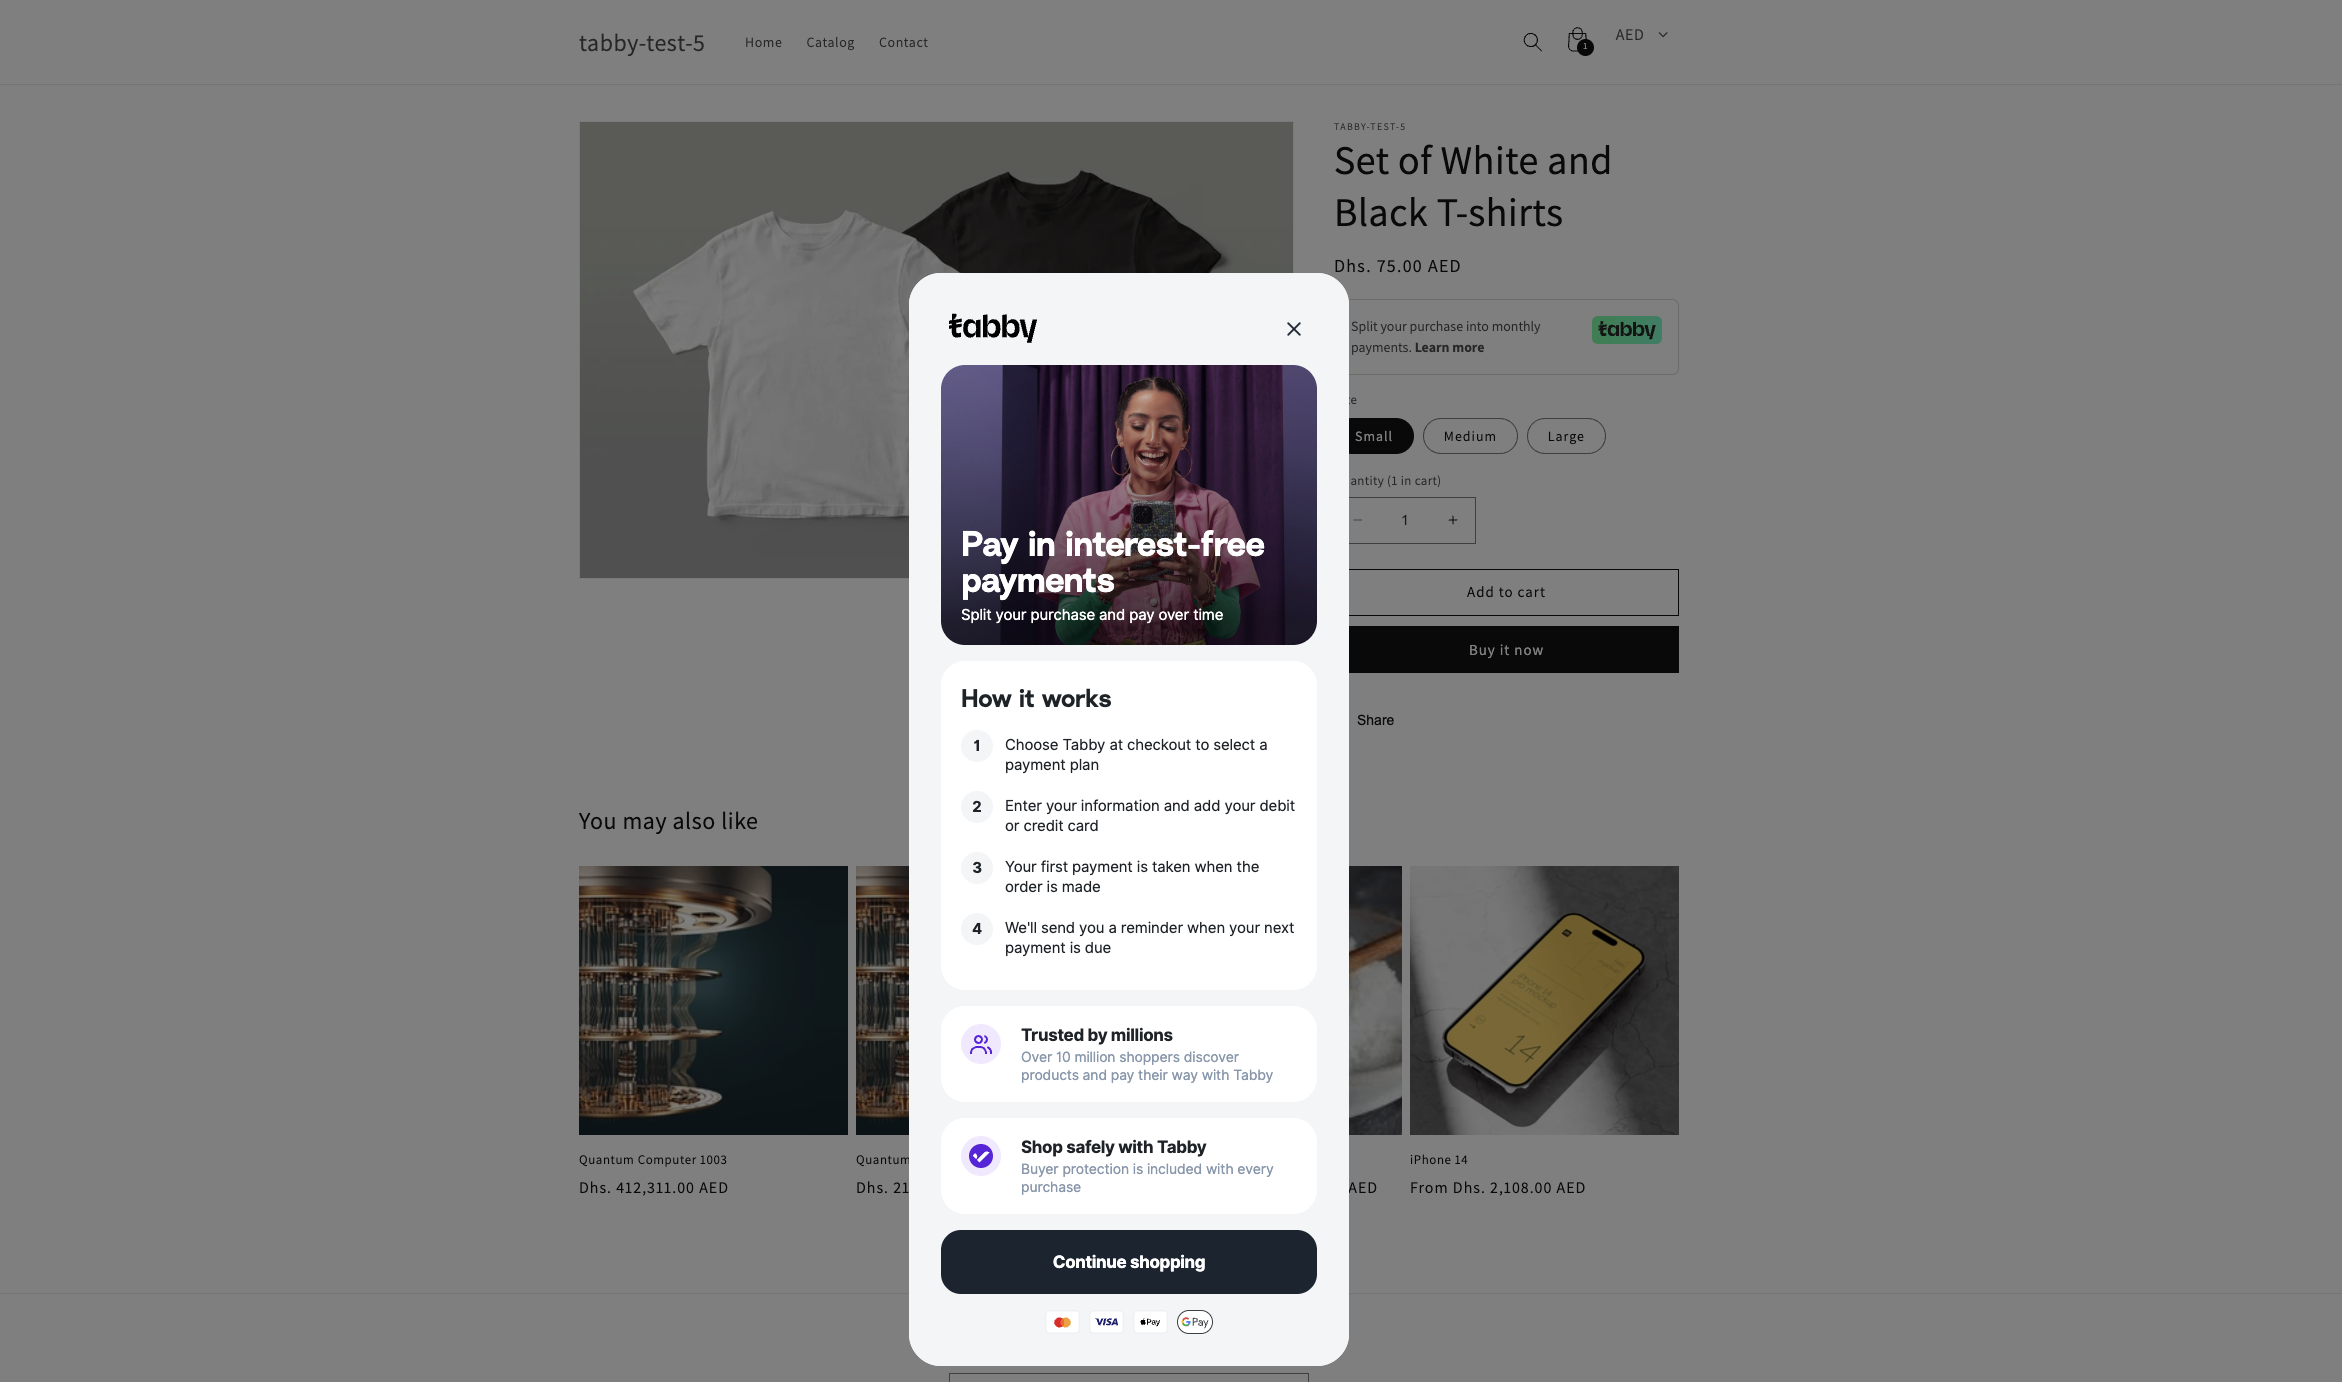
Adding Tabby Snippets on Product Pages
Here you may see a video on How to add Tabby snippet to product pages on Shopify:- In your Shopify admin, go to Online Store → Themes.
- Click the Customize button on your current theme.
- At the top of the screen, click Home page, then choose Products → Default product.
- In the left-side menu, add a block, click Apps and choose Tabby Installments.
- Drag the Tabby Installments block to a desirable position — ideally just below the price.
- Click Save and check your storefront to make sure the snippet appear properly.
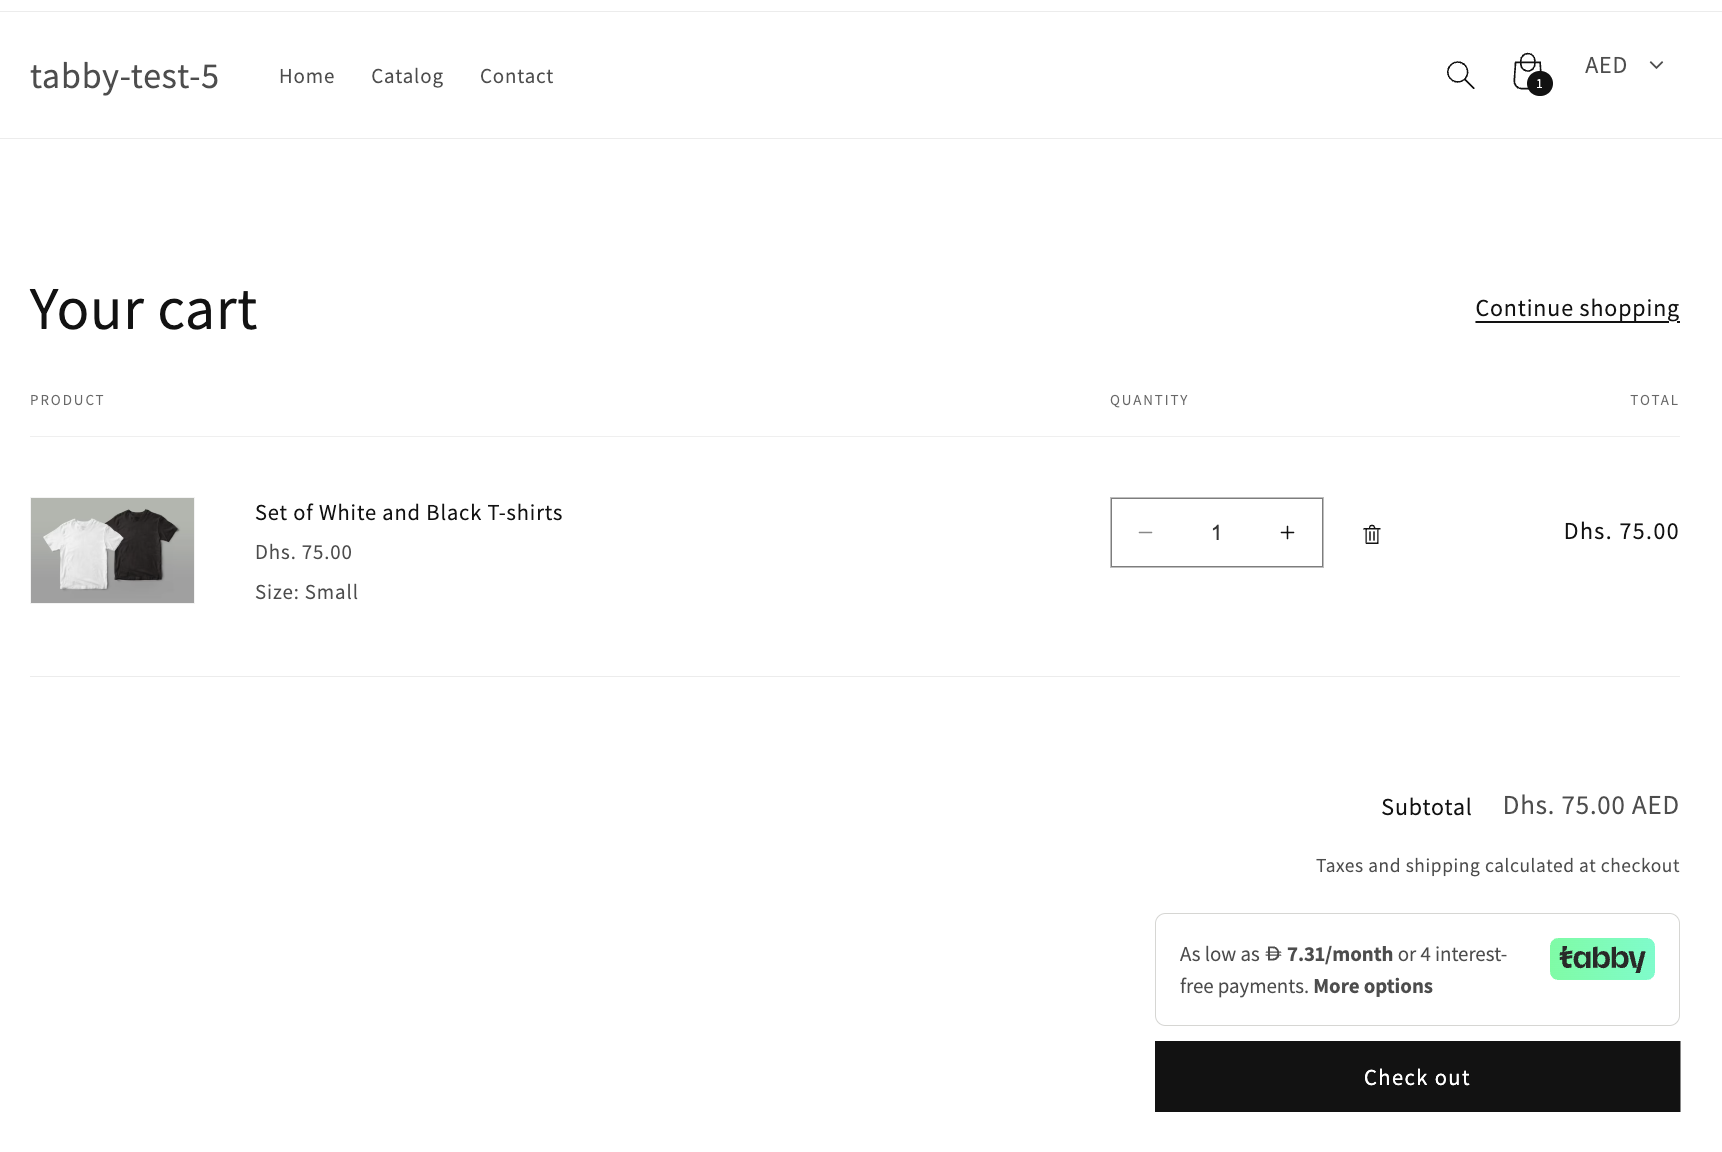
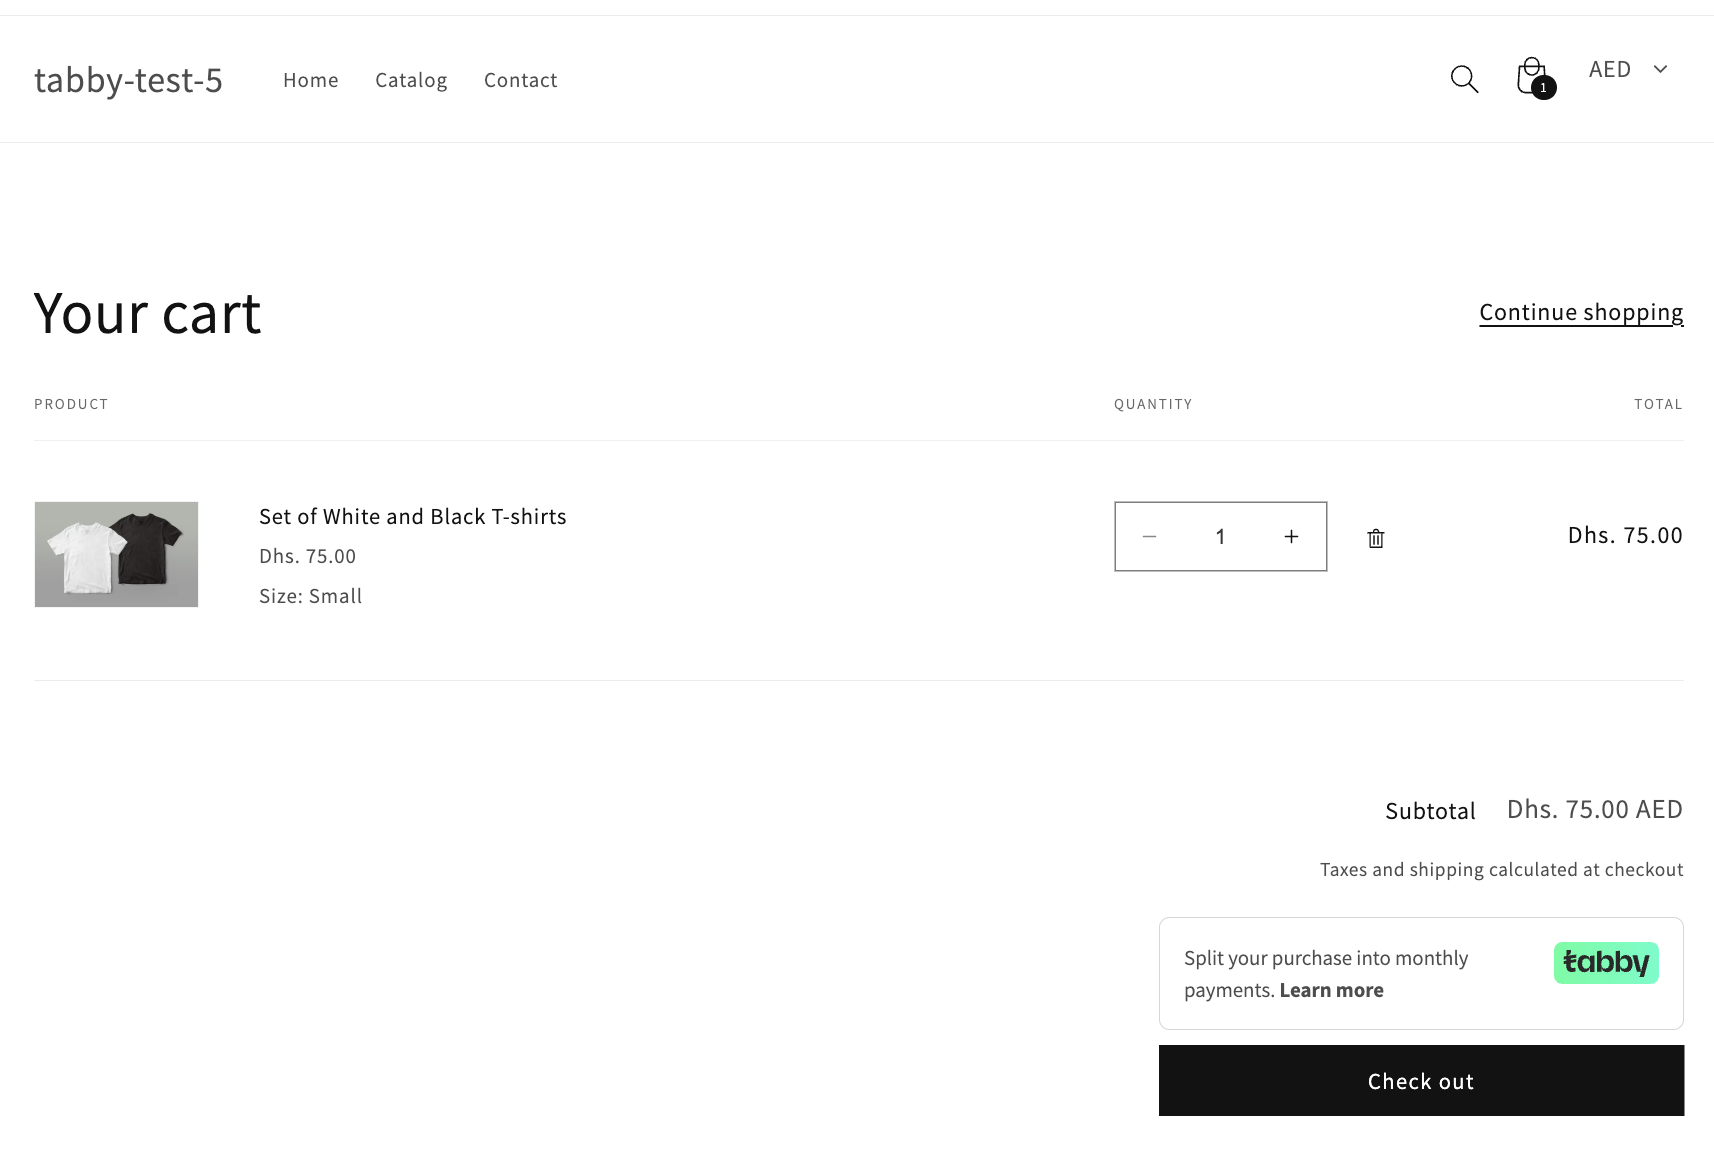
Adding Tabby Snippets on Cart Page
Here you may see a video on How to add Tabby snippet to cart page on Shopify:- In your Shopify admin, go to Online Store → Themes.
- Click the Customize button on your current theme.
- At the top of the screen, click Home page, then choose Products → Cart.
- In the left-side menu, add a block, click Apps and choose Tabby Cart Page.
- Drag the Tabby Cart Page block into a suitable spot.
- Click Save and verify that the snippets appear correctly on the storefront.
Manual Snippet Installation
Some Shopify themes may not support adding blocks on product pages. In such cases, the Tabby snippets need to be added manually. For this, you should create a file with the snippet code in your theme and render it on your product page.Step 1. Create a file
- In the Shopify Admin panel, click Online Store → Themes
- On the Themes page, click the “…” → Edit code
- In the navigation menu on your left, click the Snippets folder and click the symbol of adding a new file
- Name it tabby-installments.liquid
Step 2. Add code
- Copy one of the following codes and paste it into the file you’ve created. We offer two variants of snippets: default snippets with installments and “No-price” snippets. The “No-price” code should be used if the default snippets don’t work properly, which may be the case for some themes. Please try the “default” code first.
- Check the variables in the code: For default snippet: Put your Public API Key in the line 9 replacing YourAPIkey text. For No-price snippet: Put your Public API Key in the line 16. In the line 17, put your merchant code based on your store currency, instead of the text yourMerchantCode. Please note that you can find your Public API key in the Tabby Dashboard or in the initial email from your Tabby manager.
- Save the changes.
Step 3. Render the Snippet
- First, find the file in your theme that is responsible for the page layout. The exact file name may vary depending on the theme, but it’s typically located in the Sections folder. For product page, the most common file names are product.liquid, main-product.liquid, price.liquid, etc. For cart page, it may be cart.liquid or one of the files included in templates/cart.json (e.g., main-cart-items.liquid, cart-footer.liquid)
- Once you find appropriate file in your theme, place the following command near the price element:
- Click Save and check if the snippets appear correctly in the desired place on the storefront.
Additional scripts
This is an alternative solution for Tabby snippets that relies on the frontend price. It can be used when the main solution, which obtains the product price from the Shopify backend, cannot be applied due to theme-specific limitations.With-price Snippet Code
Here is the video on how to implement this solution:- In Shopify Admin panel click “Online Store” -> “Themes”;
- At the Themes page click ” … ” -> “Edit code”;
- In the navigation menu on your left click the “Snippets” folder and click the symbol of adding a new file;
- Put the naming “tabby-installments.liquid”;
- Put the following code in the created file and click Save:
Do not forget to check the variables in the code (such as publicKey, merchantCode, and priceElement if needed)
- Move back to the “Themes” page and now click “Customize” button;
- Choose the Products page Theme and in the left navigation menu add “Custom Liquid” (or “HTML”) object and move it under Price or Quantity Selector;
- In the content of the “Custom Liquid” put the following command and Save:
- Make sure the snippet appears in the required place at the store front.
- Please note that this snippet code only work when product page prices are displayed in a supported currency (SAR, AED, or KWD). For stores displaying prices in other currencies, the “non-price” snippet should be used.
- This snippet code might not work for customized Shopify themes. It happens because of differences in price elements. To address this, locate the price element in your theme and update it on line 50 of our code. You can use the document.querySelector method with a unique selector that targets the price element on your product page — this could be an id, tag, class, etc., depending on your theme.
- If you’re unsure how to adjust the code, you’re welcome to use the non-price snippet code.